

Just sit right back and you'll hear a tale,
A tale of a fateful trip
That started from this tropic port
Aboard this tiny ship..."
Amber's Day In a Nutshell: (<---haha! Nutshell. "Nuts in a shell." I made a funny.)
1. Get idea for a gift for BFF and her two baby girls.
2. Have this thought process: Gift requires a trip to Home Depot. Goodwill is near Home Depot. Boxes and bags piled up in new garage. Ooh! Two birds, one stone!
3. Talk husband into making the trip by promising to drive.
4. Get to Goodwill. Find out tire is low on air.
5. Go to gas station to fill up tire.
6. Realize there's a huge gash in tire.
7. Fear not! Tire store, a block down.
8. Tire store has my tires in stock ::happy dance::
9. Is going to cost $150 to have tire replaced.
10. Pout.
11. Decide that TJ Maxx across the street is the best place to kill time and make self feel happy again.
12. Step onto sidewalk.
13. Fall flat on face.
14. Get saved by husband and limp over to TJ Maxx.
15. $158.14 ($151.60 for tire, $6.54 for TJ Maxx) and three hours later, get home.
On the bright side, I got two big projects done today: the washing basin stand and the Ikea shelves. And...
I'm actually participating in my first ever Blog Party--by accident really. It just so happened I got these projects finished on the same day that Shanty 2 Chic was holding their "get together." The washing basin stand turned out beautifully. This piece is (at least) from the early 1980's so it was in need of a facelift. Buh-bye tarnished brass hardware. Buh-bye sticky lacquered wood. Hello beautiful!
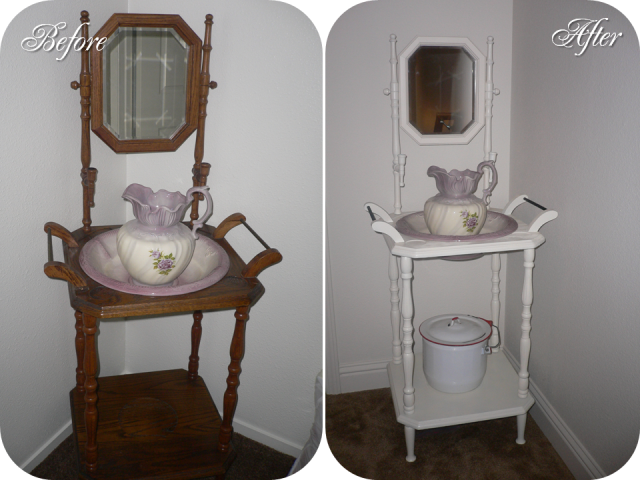
All I really had to do for this project was a lot of disassembling, priming, painting, and reassembling (except for the few hours I spent fixing a leg that was falling off. Somewhere along the line someone tried to glue it back on, not realizing the bolt had simply come loose. I don't know how long I soaked the pieces in nail polish remover before finally removing a huge hunk of old glue). I gave a few pieces a light sanding, but the primer kind of eliminated the need for it.
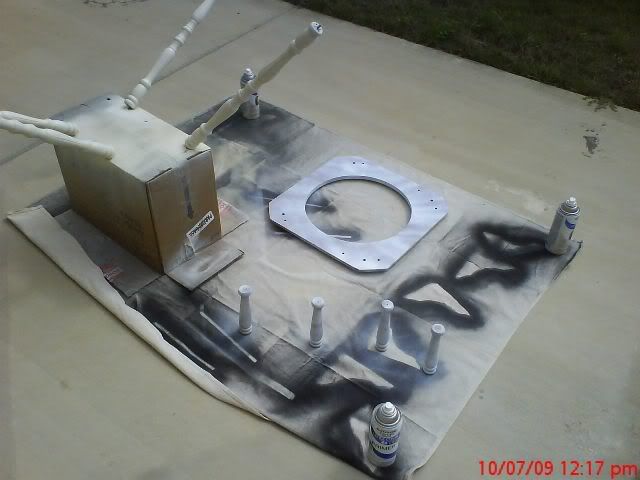
I used all Rustoleum paint (♥) and actually gave their primer a try for the first time as well. REALLY love it! I used Rustoleum Heirloom White for the wood, which is a nice soft white color. Not too harsh, not too ivory. I used their flat black enamel spray paint for the brass racks because I wanted a good contrast between the hardware and the wood (especially since there's so little hardwood on the piece).
Now for the shelves. They did turn out very nicely but oh. my. God. what a pain! And really, they're still a little on the messed up side.

Yes, they are the same shelves! Complete transformation, huh? That's what makes me happy. I used a tutorial from Traci at Beneath My Heart and her Ballard Designs cafe shelves. The tutorial is great, but my execution is what screwed me up.
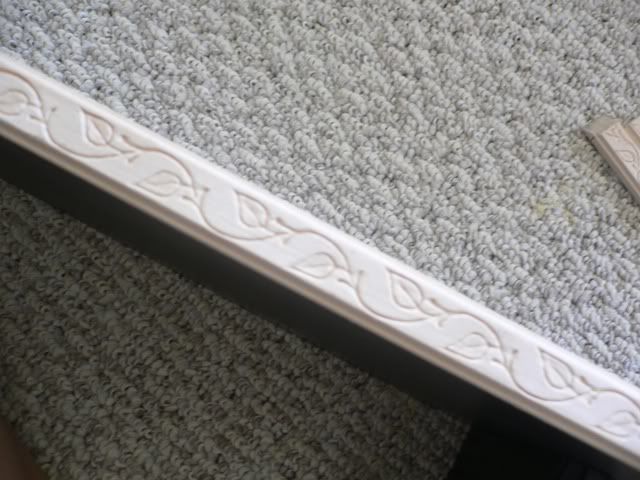
I bought a real lovely leaf trim from Home Depot to add a surprise visual interest to the shelves, and used Liquid Nails to attach them (Traci uses a nail gun as well, but at the time, all I had was my staple gun and staples. The LN works just fine). The corbels also got a couple smears of LN and plenty of drying time (I learned this the hard way when I popped one of the brackets off because the glue hadn't fully dried).
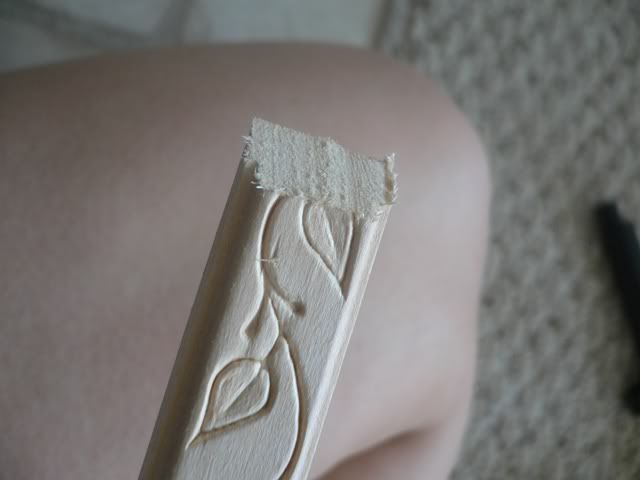
(Me learning the ins and outs of a miter box. Notice that I cut my perfect 45-degree angle the wrong way!)
The shelves had already been painted, but I went over everything again with a good dousing of Rustoleum paint in both satin and gloss spray paint. The satin was used for a base and the gloss went on top. The big issue arose when it came time for me to hang them. I bought the wrong corbels for the shelves; they have these little slots in the back that make it seem as simple as sliding them over a nail--but they pull away from the walls and tip forward with no real way to fix them. I kind of rigged them with some D-rings and large head nails for now but it really REALLY bugs me--hence the lack of super close up shots.
I'll get new corbels the next time I go to Home Depot and overall I will do this project again. I think after everything was said and done I ended up spending about $20 per shelf, but the cost will go down in the future since I'll have the necessary tools (if you subtract my miter box, saw, and Liquid Nails, the cost goes down to $11.50 per shelf).
One more time with the pretty pictures, eh?
----------
Coming up tomorrow, my $6.54 TJ Maxx purchase!
(What? You didn't think I went in there and came out empty handed did you?)
A tale of a fateful trip
That started from this tropic port
Aboard this tiny ship..."
Amber's Day In a Nutshell: (<---haha! Nutshell. "Nuts in a shell." I made a funny.)
1. Get idea for a gift for BFF and her two baby girls.
2. Have this thought process: Gift requires a trip to Home Depot. Goodwill is near Home Depot. Boxes and bags piled up in new garage. Ooh! Two birds, one stone!
3. Talk husband into making the trip by promising to drive.
4. Get to Goodwill. Find out tire is low on air.
5. Go to gas station to fill up tire.
6. Realize there's a huge gash in tire.
7. Fear not! Tire store, a block down.
8. Tire store has my tires in stock ::happy dance::
9. Is going to cost $150 to have tire replaced.
10. Pout.
11. Decide that TJ Maxx across the street is the best place to kill time and make self feel happy again.
12. Step onto sidewalk.
13. Fall flat on face.
14. Get saved by husband and limp over to TJ Maxx.
15. $158.14 ($151.60 for tire, $6.54 for TJ Maxx) and three hours later, get home.
On the bright side, I got two big projects done today: the washing basin stand and the Ikea shelves. And...
I'm actually participating in my first ever Blog Party--by accident really. It just so happened I got these projects finished on the same day that Shanty 2 Chic was holding their "get together." The washing basin stand turned out beautifully. This piece is (at least) from the early 1980's so it was in need of a facelift. Buh-bye tarnished brass hardware. Buh-bye sticky lacquered wood. Hello beautiful!
All I really had to do for this project was a lot of disassembling, priming, painting, and reassembling (except for the few hours I spent fixing a leg that was falling off. Somewhere along the line someone tried to glue it back on, not realizing the bolt had simply come loose. I don't know how long I soaked the pieces in nail polish remover before finally removing a huge hunk of old glue). I gave a few pieces a light sanding, but the primer kind of eliminated the need for it.
I used all Rustoleum paint (♥) and actually gave their primer a try for the first time as well. REALLY love it! I used Rustoleum Heirloom White for the wood, which is a nice soft white color. Not too harsh, not too ivory. I used their flat black enamel spray paint for the brass racks because I wanted a good contrast between the hardware and the wood (especially since there's so little hardwood on the piece).
Now for the shelves. They did turn out very nicely but oh. my. God. what a pain! And really, they're still a little on the messed up side.
Yes, they are the same shelves! Complete transformation, huh? That's what makes me happy. I used a tutorial from Traci at Beneath My Heart and her Ballard Designs cafe shelves. The tutorial is great, but my execution is what screwed me up.
I bought a real lovely leaf trim from Home Depot to add a surprise visual interest to the shelves, and used Liquid Nails to attach them (Traci uses a nail gun as well, but at the time, all I had was my staple gun and staples. The LN works just fine). The corbels also got a couple smears of LN and plenty of drying time (I learned this the hard way when I popped one of the brackets off because the glue hadn't fully dried).
(Me learning the ins and outs of a miter box. Notice that I cut my perfect 45-degree angle the wrong way!)
The shelves had already been painted, but I went over everything again with a good dousing of Rustoleum paint in both satin and gloss spray paint. The satin was used for a base and the gloss went on top. The big issue arose when it came time for me to hang them. I bought the wrong corbels for the shelves; they have these little slots in the back that make it seem as simple as sliding them over a nail--but they pull away from the walls and tip forward with no real way to fix them. I kind of rigged them with some D-rings and large head nails for now but it really REALLY bugs me--hence the lack of super close up shots.
I'll get new corbels the next time I go to Home Depot and overall I will do this project again. I think after everything was said and done I ended up spending about $20 per shelf, but the cost will go down in the future since I'll have the necessary tools (if you subtract my miter box, saw, and Liquid Nails, the cost goes down to $11.50 per shelf).
One more time with the pretty pictures, eh?
----------
Coming up tomorrow, my $6.54 TJ Maxx purchase!
(What? You didn't think I went in there and came out empty handed did you?)

That wash basin is too cute! Way to go and thanks for linking up!!
ReplyDelete~Whitney
You totally changed the look of those shelves! Good job!
ReplyDeleteGorgeous basin and the shelves look fab!
ReplyDeleteI love the wash basin in white and the detail you added to the shelves really make a difference! Thanks so much for linking up with us! ~ Ashley
ReplyDeleteThanks for all the compliments. The wash basin was a labor of love since it's been in the family so many years. I'm very surpised to see how crisp the white makes it look.
ReplyDelete