November 30, 2009

ho hum, the holidays


- Take down & store fall decor

- Bring in Christmas decor bins

- Put up Christmas tree

- RELAX!

- ...oh, and do dishes


Ooohhhh I haven't wanted to do anything since after Thanksgiving. Jason and I spent the weekend at The Welks Resort San Diego, enjoying a free weekend we'd earned from listening to another timeshare (we are the king and queen of timeshare goodies). We stayed in a gorgeous two room condo with a large jacuzzi tub, one of those fancy showers with multiple shower heads, and an in-room fireplace (very handy since it was cold and rainy all weekend).


Friday morning after everyone had left, we partook in some online Black Friday shopping. We jumped around Amazon, where we each spent about $50 and wound up with about five or six things for each other. I even grabbed one of their lightening deals and bought him a DVD he's been wanting (and for only $4)! I think we'll definitely do that again next year!

We also got some free ornaments! I ordered white ball ornaments from Amazon (88 for $56) and happily tore open the big box when it got here. Unfortunately...


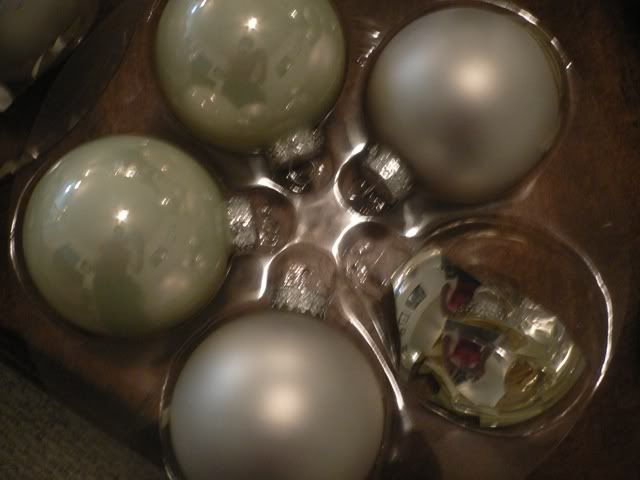
The ornaments were silver and broken! Thankfully it was only four broken ornaments (although they were the largest ones), but I was more annoyed at the fact the the listing clearly showed and said white ornaments--not silver. The seller gave us a full refund and said we could keep them. So tomorrow, I'm headed out for some primer and Heirloom White spray paint. I have a whole "look" in mind that I'll share once I'm a little further into it.

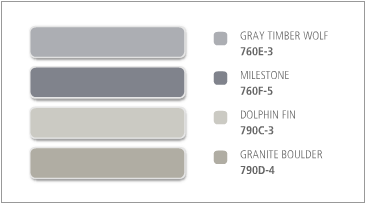
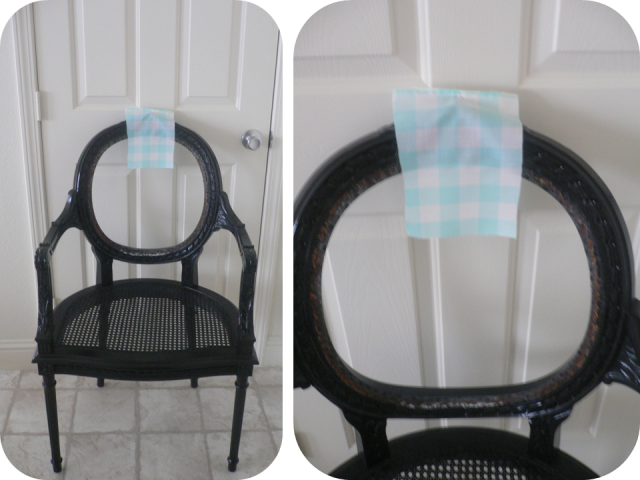
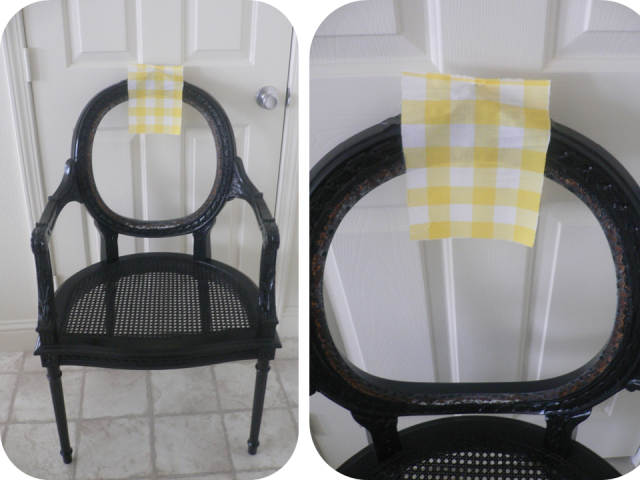
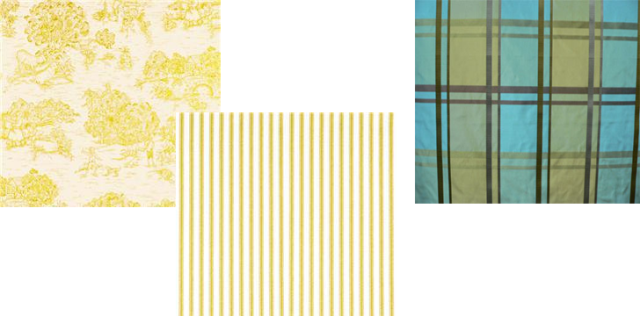
And finally ::sound the trumpets:: 10 fabric swatches later and we have our winner! Or should I say, winners?


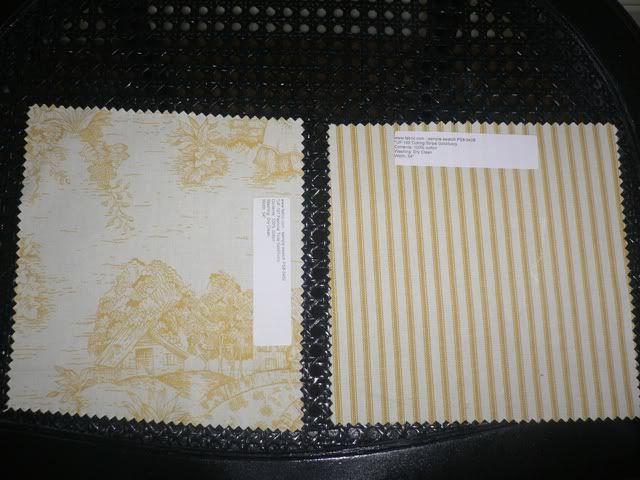
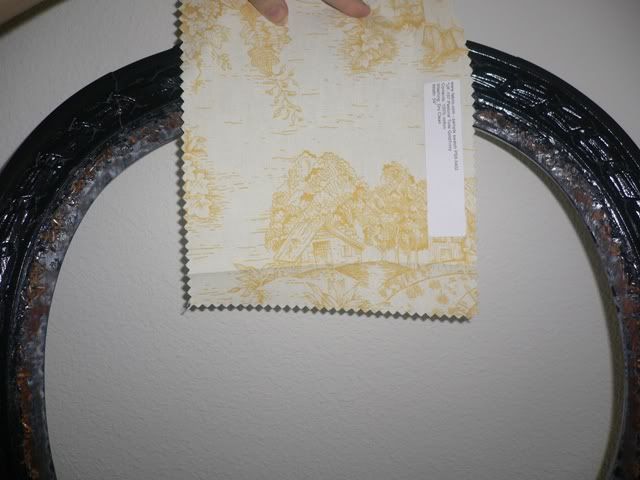
I had this sudden desire to pair toile and stripes together after seeing this decorating consultation that Layla from The Lettered Cottage did for one of her clients (the funny thing is when I showed Jason the photo, he was totally hooked on the Matin shower curtain from Pottery Barn--guess that's going on our shopping list!).


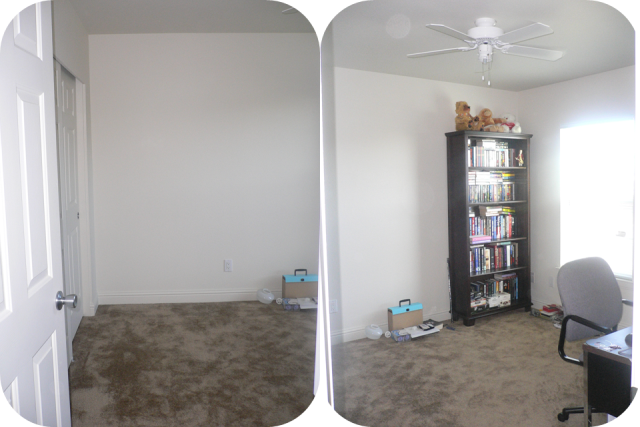
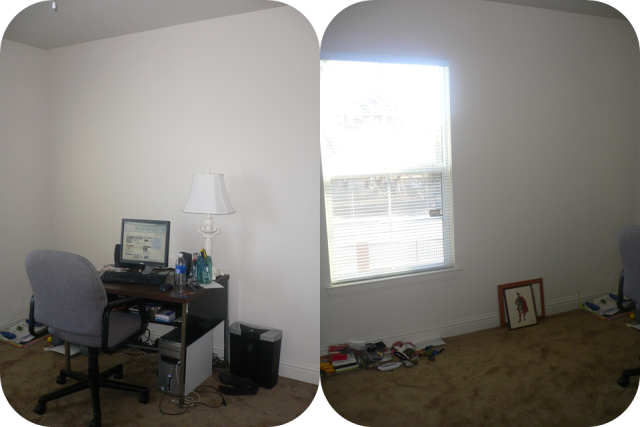
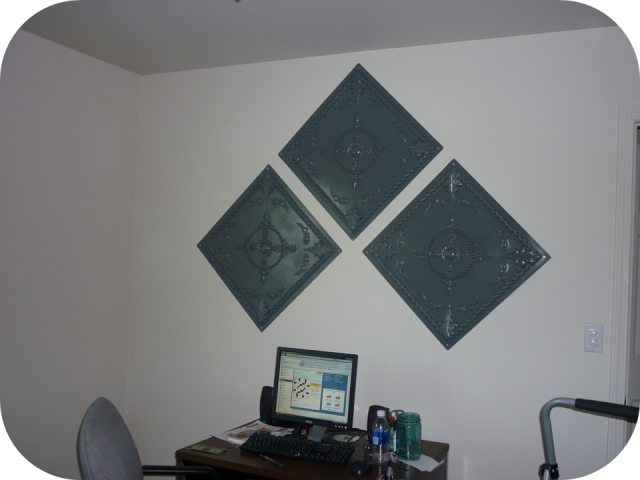
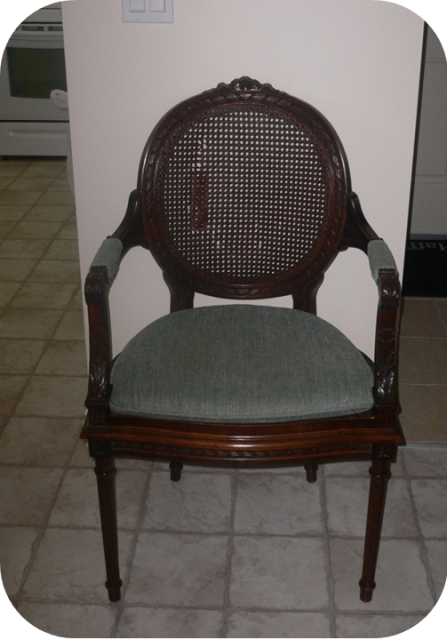
Fabric.com has a section of toile that is paired with complimentary fabrics for just this kind of project! I'm going to upholster the chair back and removable seat cushion with the toile. I'm debating on using the stripes on the arms, but either way, I'm going to find a little foot stool to upholster in the yellow ticking stripe. I think it's going to add such a pop of color to our office, which is predominantly deep browns, blacks, white, and a hint of grey.

Tomorrow I'm running out for more ornament supplies (primer, paint, hooks, and a secret), as well as buying our first set of Christmas lights for our house! I'm thinking we'll only decorate the bottom story of the outside. For one, I don't think the housing office wants us climbing on the roof (imagine the liability!) but also, I go a little white when I think of Jason trekking across those clay tiles that are so popular in SoCal.

Shopping List:
- Outdoor Christmas lights (Target/Wal-Mart)
- Primer (Home Depot)
- Heirloom White spray paint (Home Depot)
- Dowel for painting ornaments (Home Depot)
- Wood scrap for gift (Home Depot)
- Over sized ornaments (Bed Bath & Beyond)
- Ornaments hooks (Target/Wal-Mart/BB&B)
- Ornament supplies (Michael's)
- Finial (Michael's)
- Wrapping paper (Michael's)
- Jute/twine/string (Michael's)
- Garland (Michael's)
- White ribbon (Michael's)
- Bags (and bags) of batting (Michael's)

November 27, 2009

the aftermath


1. Plastic utensil bag, empty because we took most of our leftovers to the military police. 2. Crock pot, with about one-quarter cider at the bottom...and lots of cloves. 3. Half empty coffee pot from overnight guests. 4. Cider stains from multiple ladles full.


5. Empty paper towel holder. 'Nuff said. 6. Empty beer bottle and Jason's stein, to cope with the craziness that was my family. 7. Strainer and clean chargers, the beginnings of clean up. 8. $10 appetizer dish from BB&B. Best $10 I ever spent. 9. Grandma's empty cheese bag. 10. Random pot lid...must have topped something hot since there's still condensation on the lid.


11. Grandpa's extra firm and fluffy pillow. 12. My once beautiful table, now ravaged. 13. Empty plastic bags for guest doggie business (they're unused!). 14. Only remaining place card holders (mine and Jason's). Who knew they'd be great keepsakes for everyone? 15. Random white ornament I found this morning. 16. Jason's cell phone, blissfully unaware at the craziness around it.


- Take down & store fall decor

- Bring in Christmas decor bins

- Put up Christmas tree

- RELAX!

- ...oh, and do dishes


Hope you had a wonderful Thanksgiving!

November 25, 2009

simple solutions

Don't you love when you're having a design issue, and suddenly it solves itself? I had one of those moments today.

The problem: My coffee cups and saucers were taking up too much room in my cabinets. I could only fit about four on a shelf.

The solution: Hooks on the underside of the cabinet.

The (new) problem: For one, we live in base housing and we cannot drill into the cabinets. Walls are okay--cabinets are not. But, for two, our cabinets are made out of white resin.

The (new) solution: 3M stick on hooks from Wal-Mart ($3 for a pack of three) and extra stick-ums (about $4 for a pack of nine). I recommend getting the extra stick-ums because they can hold more weight. The hooks I bought only hold up to half a pound with their enclosed stick-ums. The extra ones hold up to one pound.

When I first brought these home, I really had no idea how I was going to hang them and keep them straight. Under the cabinet isn't exactly the easiest place to measure. So, I grabbed three coffee cups and started arranging. Once I hung one hook and coffee cup, I positioned another set next to it. When I was happy with the location, I pressed the hook into the top of the cabinet and repeated with the third cup. Then, I repeated the process just reusing the cups. This way I always had two cups hanging so I could judge the distance between them. No measuring required--just eyeball it.

Once I finished, I removed the cups to give the strips time to cure (about an hour and a half). They looked kind of cute waiting there for some cups.


I also loved the fact that the hooks were small, thin, and silver, so they blended in perfectly with our kitchen decor. My cups look beautiful hanging up now. And I've always loved the look of hanging coffee cups.


And if you're worried about the removal, 3M makes it really easy. You just pull this little strip backwards until the tab releases. I learned that after my first couple of misplaces. ;)


Pretty effective $10 project.

Next, was the issue with our master bathroom. I really love the set up because we have one of those walk through bathrooms. You have a small hallway flanked by closets on either side, which leads to an open bathroom area with double sinks, our bath/shower combo, and then a separate room for the actual toilette. But there's one problem with our bathroom area.


Do you see what it is? No towel holders! Aside from hand towels, there's not a single place to hang our towels up unless we want to put them on the counter inside the actual bathroom behind the door. The bathrobe hook doesn't hold the big bath sheets we like to use and they end up on the ground.

I started scouting out possible solutions online, really liking these towel/wine bottle holders.


But before I found one in the size (and price) that I wanted, I remembered something that we had just lying around the house. Literally, lying around the house.


That would be a bag of hooks we normally use for a coat rack. But the lack of wall space in this house kept us from hanging them and they've sat in their little plastic bag next to the door ever since. Today I realized that two of them (along with some silver spray paint) would be perfect on our bathroom wall as towel hooks.

However, before I could even break out the spray paint, I noticed that the remaining three hooks would be perfect on a sad and forlorn little wall next to our laundry room, and conveniently next to our coat closet.


Since we use the garage as our main entry and exit point, it makes much more sense to hang the hooks here. We're notorious for losing keys, so these hooks have always been our saving grace.

And as for that wall in our bathroom?


I can't wait to use our newly hung towels at bath time! The best part--this project didn't cost me a dime! Those are my favorite kind of projects! What simple solutions have you discovered?

I suppose now I should go and start all those last minute chores before company arrives tomorrow! Happy Thanksgiving!

November 23, 2009

manic monday


- Order fabric swatches from Fabric.com & Warehouse Fabrics

- Little brother's birthday dinner

- Organize computer room for decorating photo

- Start preparing house for Thanksgiving company

- Go to grocery store for mulled apple cider ingredients and green olives

- Paint Empire West ceiling tiles and hang (finally!)

- Sew curtains

- Hang rods in living room & bedroom

- Hang curtains in living room & bedroom


It didn't feel like a very busy weekend. But, I managed to cross everything off my to-do list! I'm hoping my fabric swatches get here soon. I've already received shipping confirmations on all of them. I'll be so happy once I finally get a fabric nailed down (ha! no pun intended!).

My little brother turned 20 over the weekend (he's the one in red). We celebrated with a nummy dinner at Olive Garden with my mom, his dad, and his friend.


(I really think we need a new camera. Please excuse the less than stellar quality.)

I also got hubby to turn his attention away from his online football game long enough to help me organize our computer room. Prepare yourself for the saddest, emptiest little room. It needs a lot of work.


One of the walls finally got a little pick me up with my Empire West ceiling tiles. This was the decorating craze on The Nest for about a year. It seriously has taken me this long to finally pull them out of the box and do something with them! At least it was free and filling artwork. They're painted with Krylon's Smoke Grey, which has a very pretty blue undertone.


My bedroom is now finally complete with curtains and rods--all of which I'm planning to switch out after the holidays. Our living room also has a few new sheer curtains, more for decoration than purpose. But it added some much needed visual interest (no pictures because only two of my three windows have curtains).

I have a lot of projects planned for after Thanksgiving, and I can't wait to share them--or get started on them!

Three days & counting until my first Thanksgiving host! ;)


November 20, 2009

honey-do friday, episode 2


- Order fabric swatches from Fabric.com & Warehouse Fabrics

- Little brother's birthday dinner

- Organize computer room for decorating photo

- Start preparing house for Thanksgiving company

- Go to grocery store for mulled apple cider ingredients and green olives

- Paint Empire West ceiling tiles and hang (finally!)

- Sew curtains

- Hang rods in living room & bedroom

- Hang curtains in living room & bedroom


Six days & counting until my big Thanksgiving debut! ;)

In the mean time, I'm procrastinating window shopping for a few things I really want this very minute in the near future. Damn budgets.

Sure Fit sofa & loveseat classic slip covers in white ($60 and $70 each).


Wooden dowels from Home Depot and wooden finials for some customized curtain rods ($1.17 each and $8.75 for 25).


Lucky Off-White fabric from Warehouse Fabrics for some new curtains ($3.49 per yard) and some black out fabric.


Grey paint.


November 19, 2009

how many swatches does it take?

You may remember this chair I bought after only the second day of living in our new house?


My brother was sweet enough to drive me to an antique mall, walk around with me while I searched for the chair, and listen to all my ramblings about the other stuff that was in there. But he got a free lunch out of it, so I don't think he was too upset! ;)

Now the chair looks like this, minus the caning in the oval center.


After agonizing over how I was going to finish off the back of this baby, I think I finally have it figured out. But I'm not going to jinx myself until I actually start working on it! Of course, before I can do that, I have to find a fabric that I like. I was going to use my ticking stripe fabric, but it turns out that against black paint, cream fabric looks dir-ty! So I had to start searching for fabrics that had a true white background.

I'm personally loving Warehouse Fabrics right now. They offer samples (not all fabric sites offer samples on all their fabrics), free shipping, and their prices aren't grey-hair-inducing. I had this idea about using a really modern, bright, fun fabric for the chair since it was so traditional.


I wanted to go with either the yellow or mint (it looks blue in the photos) gingham. Jason chose the green damask, which is called "Shamrock." It looks olive. I asked for opinions on my favorite decorating site, The Nest D&R Board, and they all chose Jason's fabric as well. But I don't want a traditional fabric on this chair. I'm kind of sorry I even ordered it in the first place.

So, trying to compromise ::she grumbles:: I ordered the same damask print in "Placid Blue."


We'll see how it looks when it gets here--apparently my computer screen is a bit deceiving. Shamrock looks like a very bright green online. Jason says he really doesn't care either way, and I do hate to be a brat and just pick what I want because it's what I want. But I don't want to put all this time and effort into the chair only to pass by it every day and think, "My God I hate that fabric!"

Edited: we've since added three more fabric swatches to the order list. I'm going to order them sometime this weekend once I've shopped my little brain out. So, in addition to "Placid Blue," we'll also be getting "Pastoral Toile in Gold" with "Ticking Stripe in Gold--" these two are specifically meant to compliment each other, and I rather like the idea of having toile on the chair and finding a small foot stool to reupholster with the stripe--and finally, "Finn Lagoon," which is a rather breath taking piece of fabric in my opinion. Of course, it's also $15 per yard, so if I'm going to cut it, I'd better be damn sure of my measurements!


November 16, 2009

fall decor

Thought I'd share some of the more simple things I've been doing around here. Namely, fall decor.

Here's the table all dressed up for her big debut (see the craziness that was here, here, & here).


The place settings use our everyday dishes from Bed Bath & Beyond (part of their "Everyday White Collection"). Jason has all but forbidden me to buy more sets of dishes. If I get going, there's no stopping me. So, yes, my holiday dishes are also my everyday dishes. ...for now. :) The place mats ($2 each), chargers ($1.70 each--they come in sets of 6 for $10), napkins ($2 each), and napkin rings ($2 each) also came from BB&B. My little pincone name holders happened to be in the big bag of pinecones I got at Michaels.


My lantern centerpiece is something I had laying around from our home in 29 Palms. I bought it at Cost Plus World Market for only $10--I wanted it as a knock off to Pottery Barn's Malta Lanterns, which cost about $40 for the same size. I sprinkled some extra leaves from my garland around the base and unless I can find something else to add, I'll probably call it done.


Moving away from the table, I have to admit that I may have gone a little overboard with my garland this year. ;) I bought four strands at Michael's right after Halloween for $4 each (not bad considering they were originally $12). It started with our bar.


I purchased a box of J-hooks at Home Depot (I call them J-hooks, but I guess they look more like a "?" than a "J"). I was pleasantly surprised to find wood on the underside of our bar. I knew I wanted to put garland there for Thanksgiving, so all it took was a few of the hooks screwed into the wood and I had a garland hanger!

Once that worked, I was on a roll. I quickly tried to assess what else I could hang garland and hooks off of. My eyes fell on my DIY shelves. They were just begging for some fall color. A quick coat of black spray paint made the hooks blend in very nicely. Then I started stringing garland from hook to hook, snipping off the ends to make them fit the length of the shelves.


I recently changed not only their location, but also the items they were holding. These were hanging on the wall next to the kitchen, but every time we rounded the corner we nearly sliced our foreheads open! I'm not sure if I'm 100% satisfied with the vignettes yet, but I like them better now than they were.


I also removed the lanterns I had hanging on the entryway wall and sat them on the shelves. They're much prettier in their new home. And if you've been keeping count, I've only accounted for two of the four strands of garland I bought. The other two are happily adorning our banisters--kept in place by good old fashioned zip ties!


(I swear the garland on the left is centered. The angle just makes it look waaay off!)

Hope your holiday decorating is turning out grogeous!

I'm linking this up to The DIY Show-Off's Holiday Party and Funky Junk's Saturday Night Special! Share your projects too!

The DIY Show Off Funky Junk's Saturday Nite Special


November 15, 2009

how to strip a table


These steps can be used for any type of furniture that can be stripped.

SUPPLIES:
  • Paint stripper (CitriStrip is a great product; it smells like oranges and if needed can be used indoors)
  • Heavy duty rubber stripping gloves
  • Plastic scraper (believe me when I say, a proper scraper is helpful! I've done it without and it takes forever!)
  • Paint brush (get the cheap ones at Home Depot)
  • Trash receptacle
  • Mineral spirits
  • Old rag
  • Wire brush

    Start with your furniture. In this case, a table (Note: I'm doing this project indoors, but all my doors and windows are open).


    Fill in any chips or cosmetic flaws with wood putty. Let it dry and sand it smooth.


    With your rubber gloves on, pour the CitriStrip from its container onto the table top. Don't be afraid to glob it on there. It needs be thick for it to work its best. Spread the stripping gel across surface using paint brush. Add more CitriStrip as needed.


    Let the CitriStrip sit for about 10-15 minutes, depending on how thick you applied the gel and how many layers you have to work through. The surface will start to bubble. This is a good thing! When most of the surface has puffed up, start scraping with your plastic scraper.


    Work your way around the table, scraping and tossing the surface rejects into your trash receptacle. If you have multiple layers to get through, apply another coat after you've finished your first round of scraping. Note: do not let the gel dry on your surface. It gets hard and it's just a pain to try and chip off. You can tell it's drying because it turns white.

    Using your wire brush, get into the small cracks, crevices, or curves of the table.


    Once you've stripped all your layers off, take your old rag and apply mineral spirits to it. Rub down the surface of the table with the mineral spirits, making sure to remove all the CitriStrip. Once the mineral spirits have dried, you can do a light sanding to remove any excess CitriStrip (they usually appear as white streaks). I usually go over it once more with mineral spirits after I sand.


    Now you can continue stripping the rest of your piece, or give it a light sand (like I did), prime, and paint it all.

    Check out the finished product here.


    Disclaimer: Be sure to read all instructions and take all safety precautions necessary when doing this or any DIY project. I am not a professional, just a blogger passing on my knowledge and experience.
  •