September 30, 2010

Fall decorating part three: the master bedroom

Wreath I made with Dollar Tree supplies, $7 total.


Mini-pumpkins from Tuesday Morning, $3 and $4. Switching out the wooden roses for leftover floral picks, $0.


Grapevine pumpkin from Michael's, $14--way cuter, cheaper, and the same size as Pottery Barn's small grapevine pumpkin. I actually bought another small one and a large one with a 20% off coupon! And it does actually light up, but the cord is too short/my dresser is too tall for it to reach the outlet.


And this is probably about as far as I'll get with my fall decor before Jason gets back. But that's okay because in this house fall lasts all the way until Black Friday. ;)

I'm linking up to:
The Project Parade @ The DIY Show-Off

September 28, 2010

10 Steps to a DIY Tufted Headboard


There's any number of tutorials out there for how to DIY your own headboard (and yes I realized it just said "do it yourself your own headboard"), but I'm going to throw mine into the mix anyways! I'm also going to let you in on the cost cutting tips I discovered while making ours! ;) Because of this, if you'd like to skip past my narratives, just look for the "»" and you'll know those are actual instructions.

SUPPLIES:
  • Plywood or MDF for your base (get something on the thicker side)
  • Foam & batting for your padding
  • Fabric
  • Buttons
  • Spray paint and primer
  • Wire, wire cutters, and needle
  • Hanging hardware
  • Drill, tape measure, pen

    »Step one, decide how big you want your headboard to be.

    We have a queen sized bed, which is 60" wide. I knew I didn't want any sort of overhang, so the width of my headboard was going to be exactly 60". I also knew that I wanted something with some height and drama, so originally I chose to do an even 48" tall (or 4'). Unfortunately, after measuring my car's trunk, I had to pare it down to 42" tall. So my final base size was 60" x 42".

    I used a 2" thick piece of plywood from Home Depot. Some people would rather work with MDF, but I was on a tight budget and I got a 4' x 8' piece of plywood for less than $20.


    »Step two, decide how many buttons you want and how you want them placed.

    I decided to have a 6" cushion space around my edges. So I started by marking 6" down, and 6" in. From there I made marks every 7" from the top of the headboard, just because it made everything nice and even. Going across I think I made them every 5". I ended up with a total of 25 marks, but I only used 3 rows. So essentially, I had 15 button holes.


    Step three, make a grid.

    »Using a tape measure (and probably an extra set of hands if you need them--I did!), start drawing lines from each of your measurement hash marks. Wherever the lines cross, that's where a button goes.


    You can see where I messed up on the final grid. Perfection is highly overrated.

    »Step four, drill your button hole.

    If it helps, you can draw a little bulls-eye dot on your overlapping lines. I found it a little easier so I knew exactly where to put my drill bit.


    (By the way? My final holes ended up being muuuuch bigger.)


    Step five, apply your foam and batting.

    Here's where I started running into the big bucks budget-wise. Because of my odd(er) shape, I was going to have to buy 2 yards of foam to fit my 60" in length, but JoAnn's only sold it in 24" wide pieces. Which meant I now had to buy 4 yards. Their foam is priced at something like $24/yard for the two inch thick stuff (the minimum thickness I wanted to foam to be). Did you do that math? We're talking almost $100 for foam!

    I went back to the drawing board and decided instead to use a foam mattress topper, or what we called in my grandma's day, an egg crate. A full-size 3" thick mattress topper on Overstock.com was only $50, and its dimensions were more than ample at 51" x 72." So that just saved me an additional $50!

    »Once the foam was cut down to size, I flipped the actual egg crate side over so that the smooth side was facing (what would eventually be) the front of the headboard. I didn't use any sort of adhesive, I just laid everything down on top of one another. Apply batting using a staple gun. Trim any excess.


    (see? egg crate side towards the plywood.)


    Step six, apply your fabric.

    This is another area I ran into challenges budget-wise. In my head, my ideal headboard was an ultra rich suede fabric. This ran for about $35/yard at JoAnn's, and even with a 40% off coupon, I was still looking at almost $21/yard or $42 total for my fabric (not including shipping--my JoAnn's didn't carry it in-store). $40+ was not copacetic for me (or my budget).

    Then I realized, Hey, window panels are typically 54" wide, and 80-something-inches long. And they only run around $20. My good friend Overstock.com beat out even Wal-Mart's prices, and I landed a great 56" x 84" chocolate colored suede panel for only $18. Cha-ching! That $24 saved just paid for my button kits!

    »Using the same method as you did when applying your batting, apply your fabric. If you're using a print, make sure it's centered and lined up right. Pull everything nice and tight. Trim any excess.


    I pulled mine a little too tight and wound up with little ripples. Meh.


    »Step six, deal with your buttons.

    If you're using a button kit to cover them in fabric, this is where you do that. If you run into snags and want to throw the whole thing out the window like I did, read on...

    I purchased button kits, with the inention of covering them with my (plenty of) leftover fabric from the curtain. For one, I went cheap when buying the kit, which made covering them in fabric difficult.

    For two, when I was laying out my buttons, I realized I was short! They only came in packs of 3, and I thought I only needed 20. Guess who ended up being short 4 buttons? (Hint: ME!) So now, I didn't have enough buttons and after 20 minutes of trying I hadn't been able to cover a single one with fabric. >>palm. forehead.<<

    I really didn't want to just hang a brown square above our bed (although I won't lie--it was totally an option after those couple of fails). I couldn't return the buttons because I had opened every. single. package., and I felt just rotten at the idea of wasting any sort of money.

    But then, the light bulb went off. I thought, Has anyone ever painted their buttons? Why not? I had plenty of brown/oil rubbed bronze/espresso spray paint! And what did I have to lose?


    Step seven, start tufting!

    I used a 20-gauge wire since my layers were so thick. Believe me when I say floss and embroidery thread do not work! They snap like twigs. I already had wire cutters on hand, and the wire ran for $3 at Michael's in the jewelry making section.

    Using a large needle, loop the wire through and pinch to secure.


    Push through the back of the headboard (towards the front), loop needle and wire through the back of the button, and thread back through the hole (sorry, didn't get a pic of this part).

    To secure the button, I pushed on it with my knee to get a tight tuft, and used a "?" hook to wrap the wire around. I used pliers to make sure everything was wrapped as tight as it could be.


    Repeat until it feels like your fingers are going to fall off and you're sweating like a farm animal!


    »Step eight, mount your hanging hardware.

    A French-cleat hanging system is said to be one of the best ways to hang heavy objects. If you don't happen to own a fancy cutting machine to make your own, Home Depot sells them in their hardware department with their picture hanging supplies. OOK is the brand name, and they run about $10 for a system that holds 100 pounds (which is what I got--this thing is hanging above our sleeping heads after all!).

    Just make sure you center everything so your bed and headboard pair together like two peas in a pod (or two nuts in a shell--hehe!).

    »Step nine, hang your head board.


    (okay, so my rows aren't perfect! as I said before, perfection is highly overrated!)

    »Step ten, admire, swoon, and take lots of pictures.


    You can see now why I wasn't worried about only doing three rows of buttons: the bottom two rows would have been covered by our pillows anyways!


    And there you have it! 10 steps to a DIY tufted headboard!

    BREAKDOWN:
  • Plywood - $18
  • Foam (aka, mattress topper) - $50
  • Batting - $10
  • Fabric (aka, curtain) - $18
  • Button kit - $18
  • Wire - $3
  • Primer & paint: $0
  • Hanging system - $10
    GRAND TOTAL: $127

    I actually only paid $99 for our headboard, because the plywood and hanging hardware were purchased with a gift card I got for my birthday! Now that's what I call budget friendly! Yes, for $127 you can buy pre-made headboards from Wal-Mart, Target, and even places like Costco. But for this price you can't beat a headboard that towers over your bed at nearly four feet tall! And people are a lot more impressed when you say "Oh that little thing? That was just something I did one weekend when I was bored!" ;)
  • September 24, 2010

    The master bedroom "reveal"

    Since it's not technically done, there will be more photos down to road--not to mention I still have to show you what I end up doing with the master bathroom, but that's definitely still a ways off. Please disregard my wrinkled duvet--I'm still planning to have it dry cleaned and hopefully it'll be nice and magazine-worthy-smooth once it's done. Let's just have a few refresher photos, shall we?

    The 
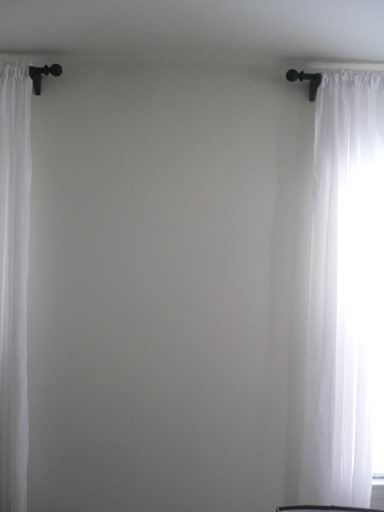
very before, in 29 Palms. So. Sad.


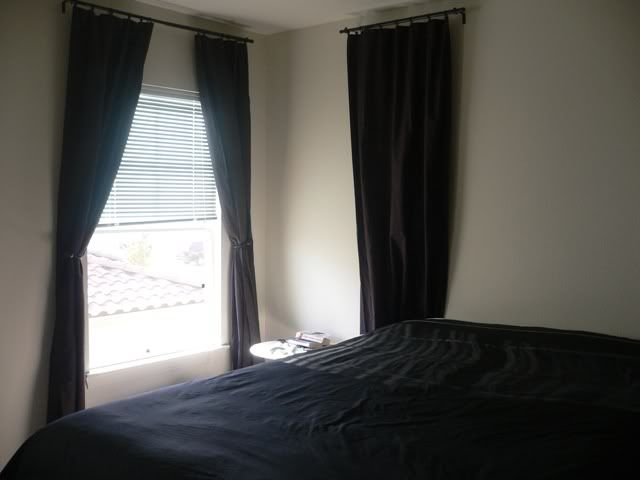
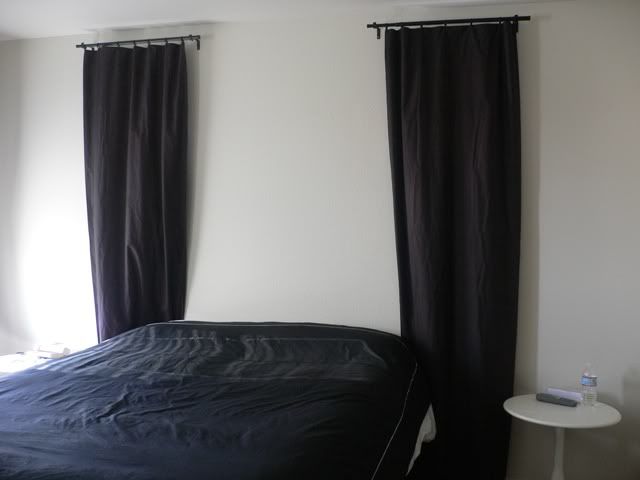
    The "update" it got when we moved to the new house.


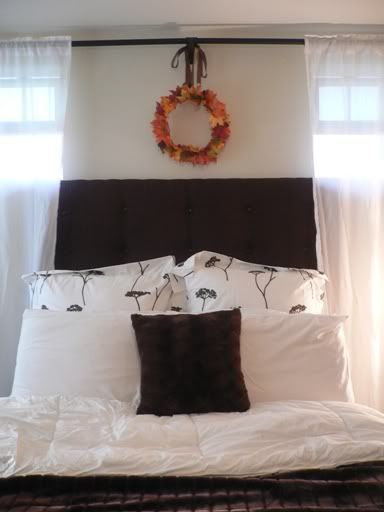
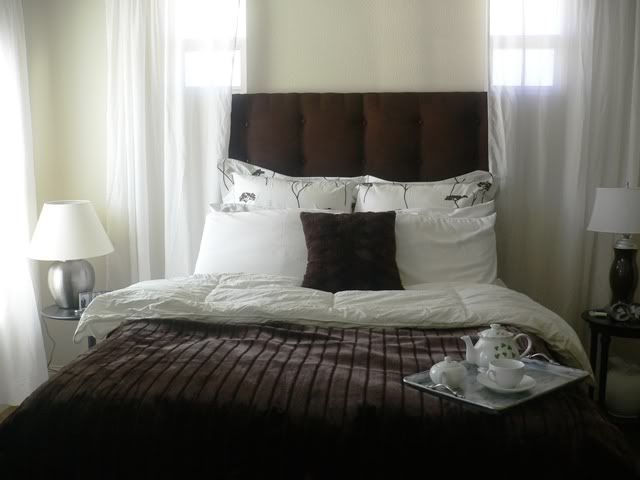
    And after. I splurged on the faux fur blanket, which was $150 at Nordstrom. Mom and I had seen it one day and I was instantly enamoured by it. A week later I went back to return a purse and bought it! It was worth every penny as I feel it gives the room a very decadent, sumptuous feeling to it. The silver tray I made out of an old cookie sheet. You can check out that project here.


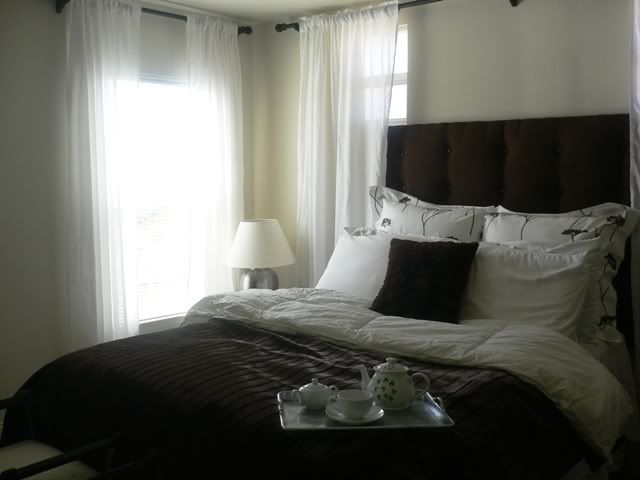
    I wanted our room to feel romantic, modern, but with a hint of vintage/eclectic to it as well, and I think I accomplished it!


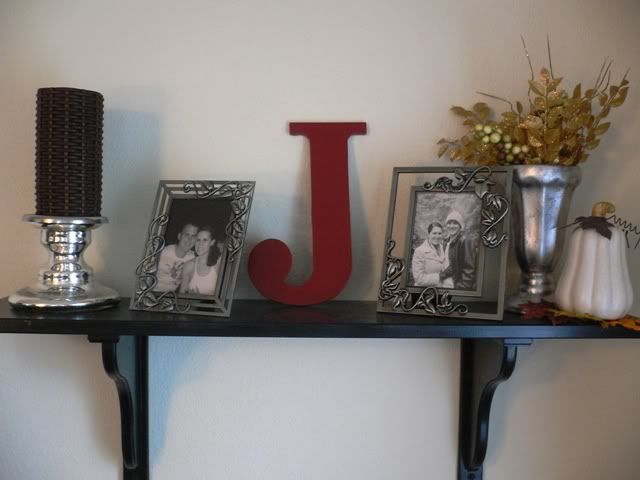
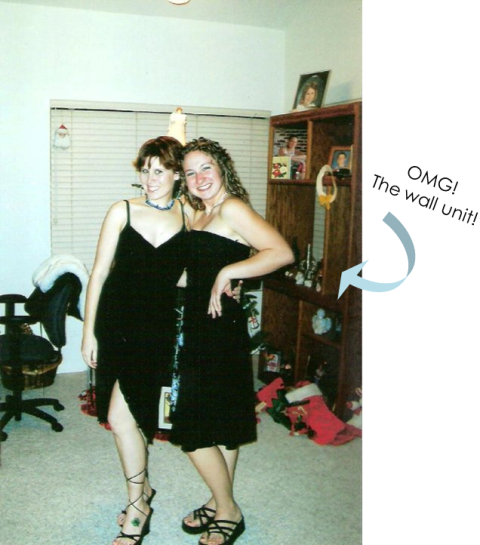
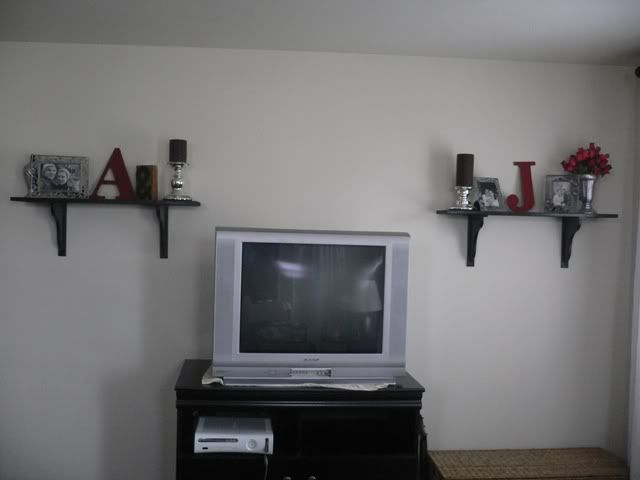
    You may remember what the main wall looked liked before. It definitely needed something since it's directly across from our (now amazing) bed, and the room would have felt off if this wall was left empty.


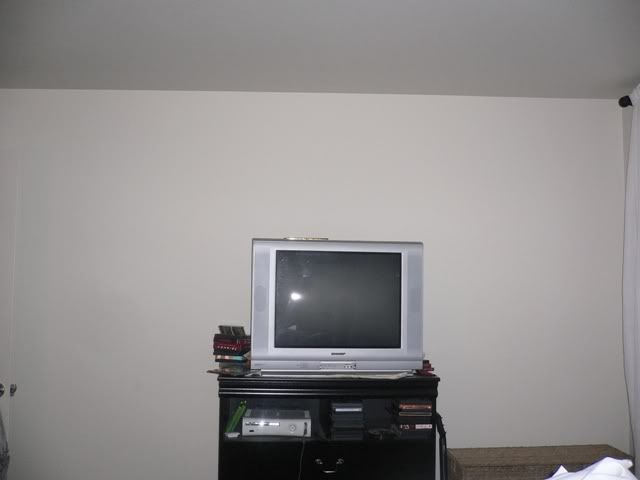
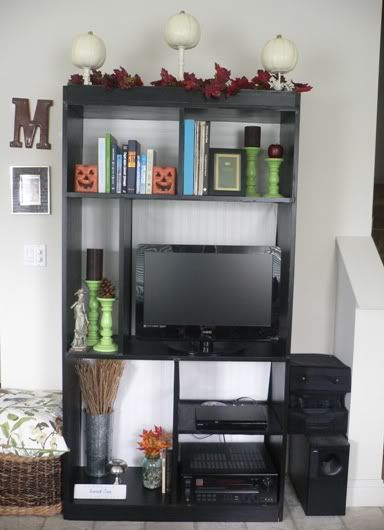
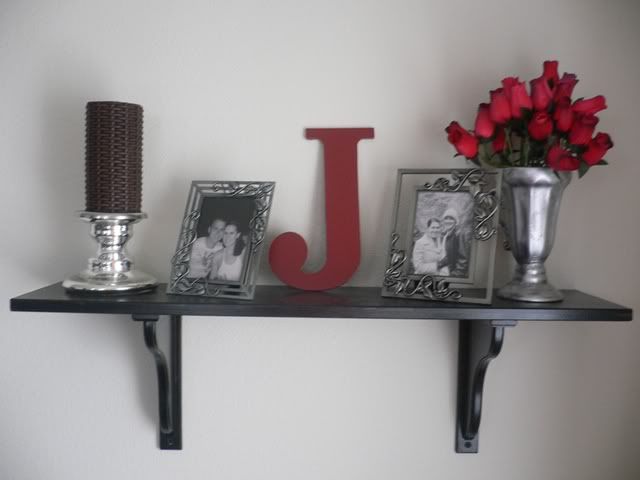
    The shelves and brackets I picked up from IKEA and painted really help to fill up all the blank space. 
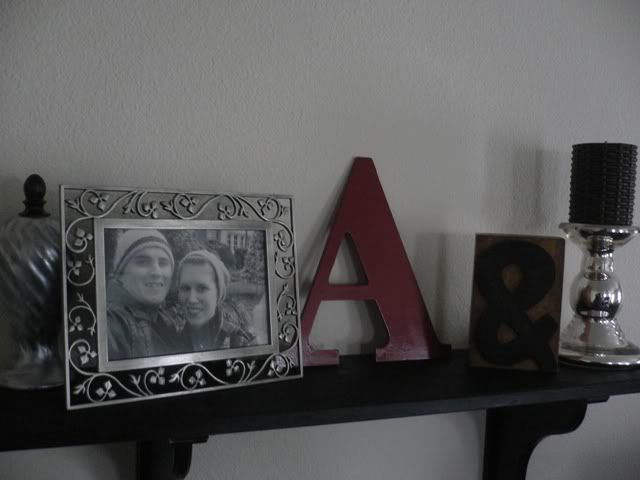
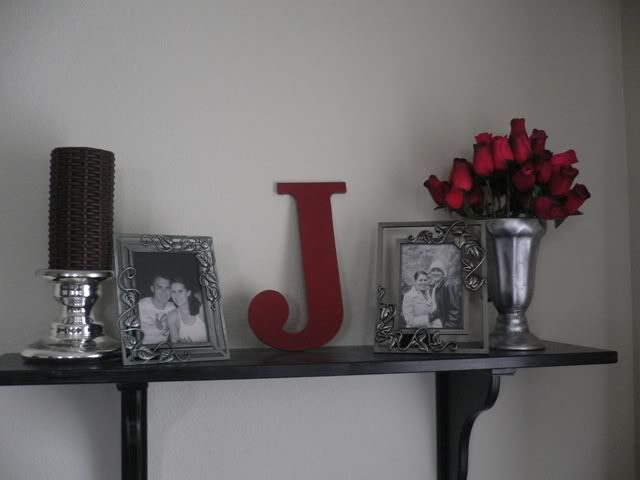
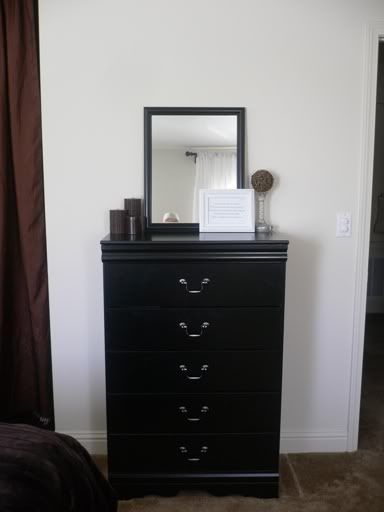
They were decorated using mostly home shopped and freebies, with a few store-bought items (post make-over). And I do still plan to make a runner for this dresser. But I might wait and see if we get a new TV first...
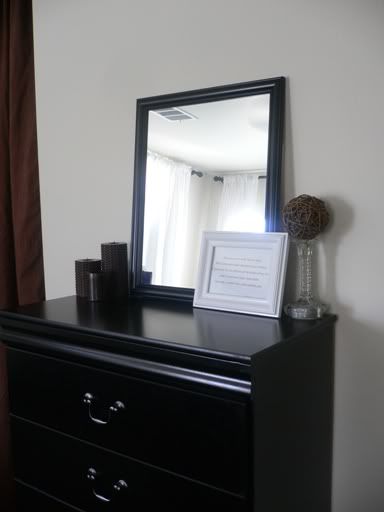

    (hello reflection!)


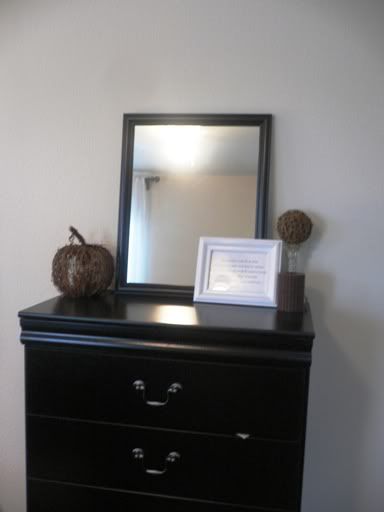
    This little dresser needed some sort of pick-me-up as well. My readers suggested leaning a mirror against the wall to make it look more like a set, and I really liked the idea! I picked up cheap-o plastic framed mirror from Wal-Mart for a whopping $18, gave it a coat of satin black paint (I didn't want it to be super glossy since the dresser isn't either).


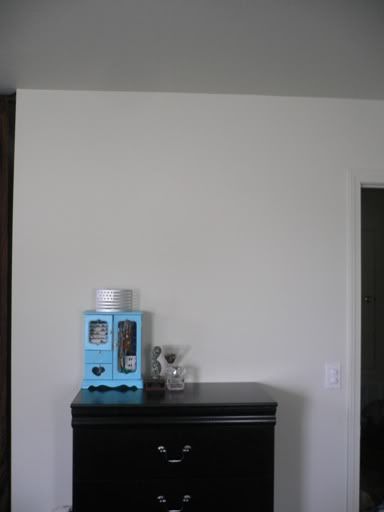
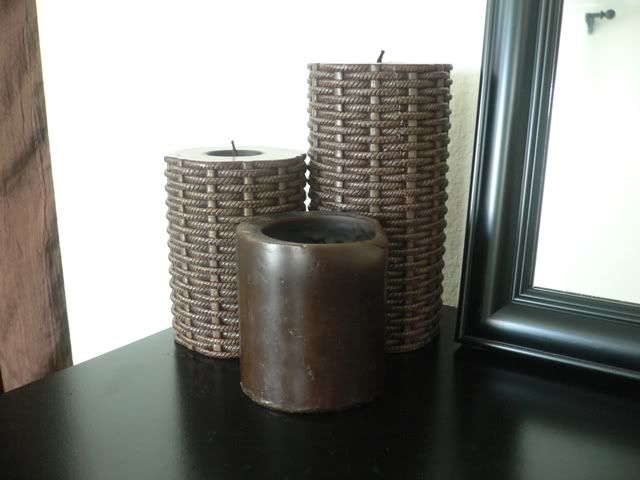
    I added some more of my $3 Michael's candles, along with a plain one too to mix up the textures.


    Another on of my thrift store candle sticks, and a twig ball that was originally downstairs in my spring/summer decor. The picture frame was black, but I thought white would pop better since the mirror and dresser are both black. It may become apple green in the future.


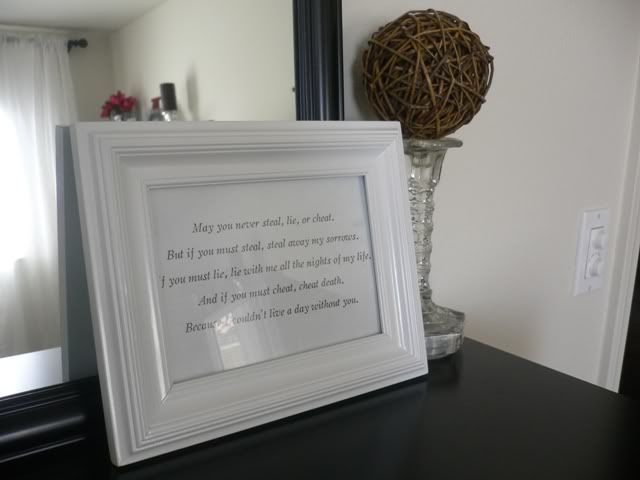
    The saying inside is from "Leap Year" (c'mon, you knew I'd get an Irish element in there somewhere). When I heard it, it made me bawl and I knew I had to have it in our bedroom. It says:

    "May you never steal, lie, or cheat.
    But if you must steal, steal away my sorrows.
    If you must lie, lie with me all the nights of my life.
    And if you must cheat, cheat death.
    Because I couldn't live a day without you."

    And now for the part that everyone is always the most curious about: the price tag. Just remember, this isn't actually complete since I haven't taken the foot stools to an unholsterer yet and that will probably tack on a few bucks.
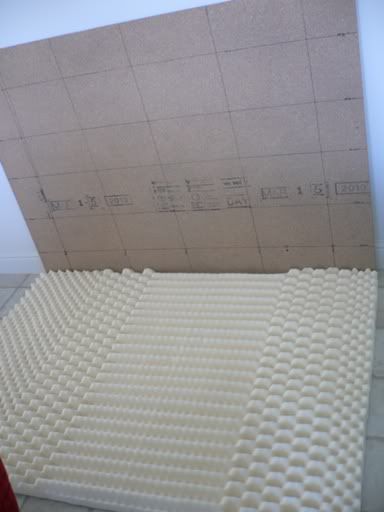
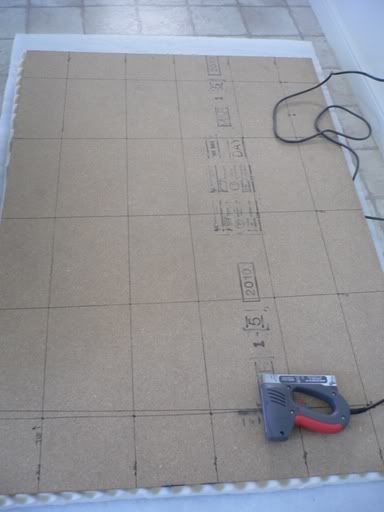
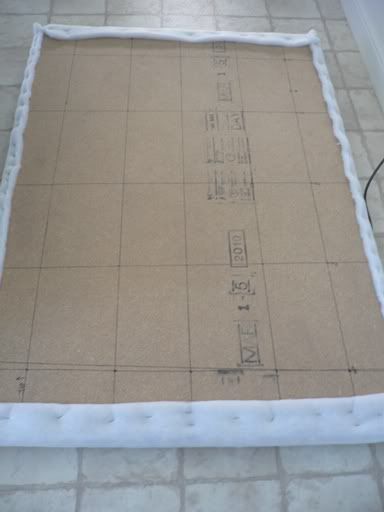
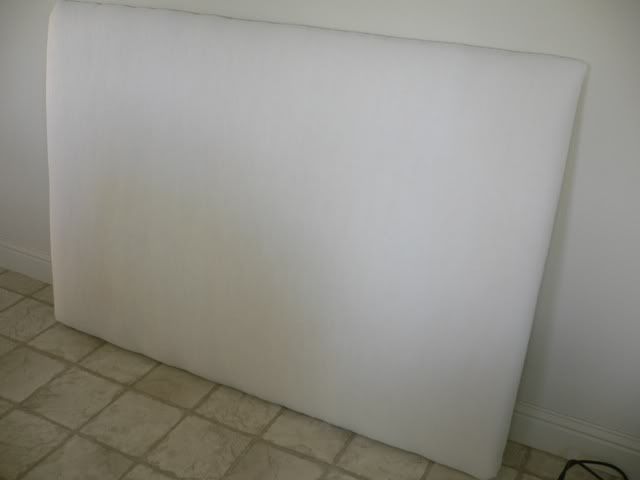
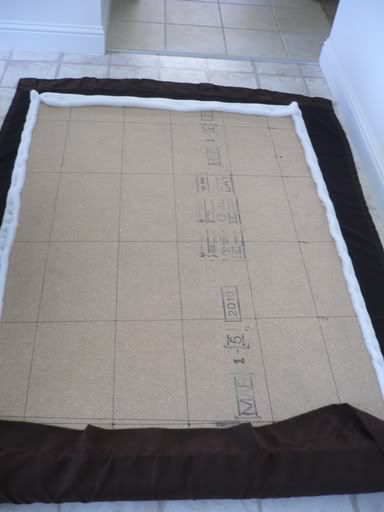
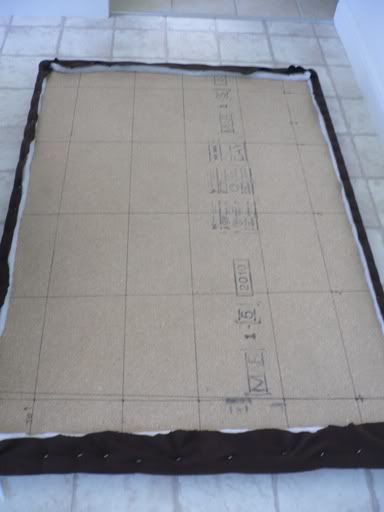
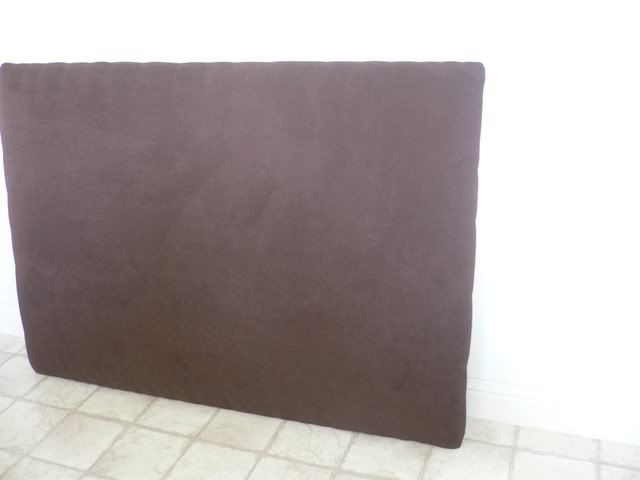
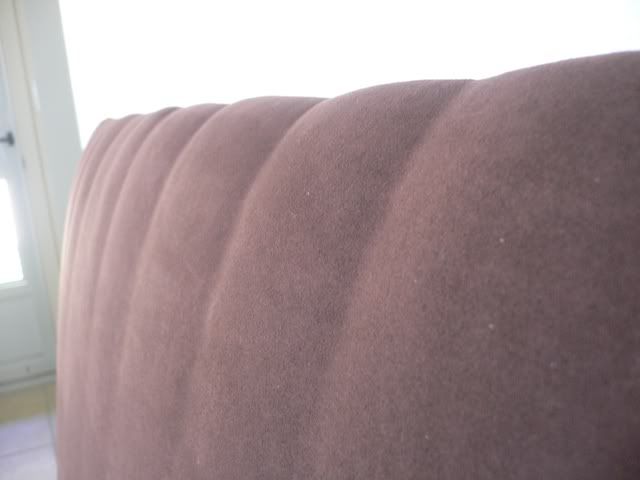
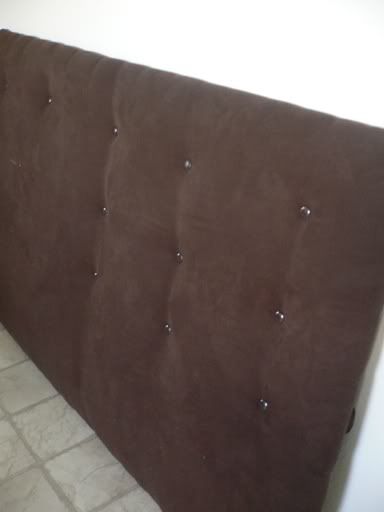
    BUDGET

    - Bed/headboard (DIY) - $99 (I'll be posting a tutorial on this in the next few days!)
    - Window Treatments - $58
    a. Hardware (Home Depot) - $0 (purchased with gift card)
    b. Curtains (IKEA) - $48
    c. Blackout curtains (already owned fabric) - $0
    d. Velcro (Joann's) - $10
    - Paint (Home Depot) - $0 (purchased with gift card)
    - Bedding - $238
    a. Faux-fur blanket (Nordstrom) - $150
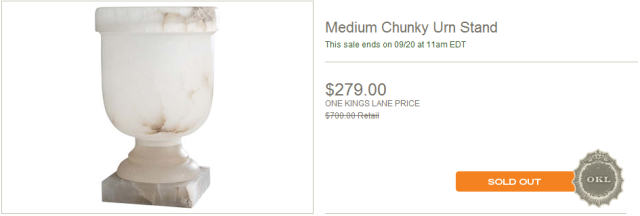
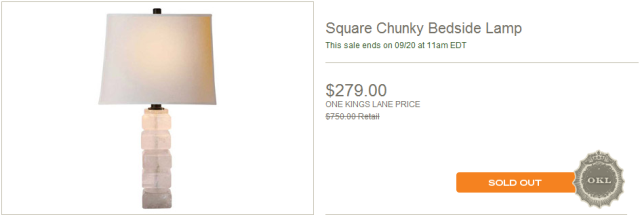
    b. Euro shams (One Kings Lane) - $34
    c. White pillow cases (4, Wal-Mart) - $22
    d. Pillow inserts (eBay) - $32
    - Décor/Misc. - $118
    a. Amber’s lamp (from Mom) - $0
    b. Amber’s side table (reused from other room) - $0
    c. Jason’s lamp (IKEA) - $60
    d. Jason’s night stand (already owned) - $0
    e. Shelves (IKEA) - $16
    f. Brackets (IKEA) - $10
    g. Candles (Michael's) - $6
    h. Pottery (World Market) - $16
    i. Picture frames (from Grandma) - $0
    j. Mirror (Wal-Mart) - $10


    Running Total: $513

    I'm amazed at how much more sophisticated it looks! And for less than $600? Hoo-ray. Yes, this took some time, but it was worth it. I've found that taking my time and finding things that make the bedroom juuuuust right is more satisfying than buying stuff all at once and then donating most of it to Goodwill once something better comes along.

    I'm linking up to:
    The Project Parade @ The DIY Show-Off

    Preparing for Jason

    Talk about having a laundry list of items to do! Between a few last minute things for the house (I've come to accept that no, the room will not be 100% finished when he gets back, but it will be dang close!), grocery shopping, Jake's fiancée Stacey coming in from Minnesota--and oh yeah!--my day job, I'm going to be crazy busy!! I have a ton of stuff I also want to post about before the clock strikes midnight and I turn into a pumpkin I go into hibernation with my hubby, including the winning homecoming dress.

    So guess what time it is? Honey-Do time. For shizz. Only this isn't just a weekender's list--this is a serious it's-time-to-git-'er-done list!


    - Grocery Shopping
    Among other things, tiramisu from Olive Garden is on my "need to buy" list!
    - Have duvet dry cleaned
    I had an unsuccessful attempt at washing it at home.
    - Make chocolate covered strawberries
    Seriously? These things are like $5 at a candy store! If I can DIY furniture, I can DIY these!
    -Purchase mirror for bedroom
    - Mop, sweep, & vacuum like crazy
    - Paint other foot stool

    They won't be reupholstered before Jason gets home, but they can at least match.
    - Find cold weather alternative for homecoming outfit
    After all that work, I'm going to have to prepare for the likelihood of grey, drizzly, or smack dab in the middle of the night for Jason's arrival!
    - Hit up Tuesday Morning & Dollar Tree for some cheap fall decor
    I just need a few more things to finish my decorating extravaganza (see parts one and two here).

    By Sunday, I'm hoping to have a shot of the room in its no-it's-not-actually-finished-but-it's-pretty-dang-close stage, and a shot of the winning dress, plus its cold weather look. So here we go!

    It's the final countdown!

    September 21, 2010

    Time capsule

    I was updating my FB page with some pictures of the shelves I just hung in our bedroom, when I came across this photo of me and my BFF Stephanie from back in 2004 (that's pre-Jason folks!). We're all dressed up and on our way to my company Christmas party (we were both sans any permanent man in our lives at the time, so we were each other's dates that year). Note the odd angle my body is turned at--I'm showing off my then-brand-new clover tattoo! But check out what's in the background!


    YES! That's the wall unit in its original home (a.k.a., my parents' house). I told you this thing was old! One year later it would be sitting in mine and Jason's first apartment, and six years later, it would look like this.


    Isn't that insane?! I'm so glad I kept this big hulking peice of furniture! It still has so much life left in it. I wonder if someday our kids will be DIY-ing it and making their own too?

    and if you want to see how i managed to revamp this giant, check out it out here.

    September 18, 2010

    One Kings Lane

    Chances are, you've already heard of this website from some other way-more-trendy-and-ahead-of-times-than-me blogger, but if you haven't--yay I get to impart wisdom! ;)

    One Kings Lane is an interesting site to say the least! You have to be a member to peruse their pages, but it's free and they give you a $15 store credit just for signing up! I signed up both Jason and myself (I know, I'm such a little cheater) and bought two of these beautiful shams for our bed. I just love their simplicity and how chic they are. And since I used a total of $30 in credit, I only paid $34 after tax and shipping for two of these fabulous cases!


    But if bedding's not your current obsession cup of tea, they have a ton of other things that are always on sale! I thought these lamps were absolutely gorgeous! They're made of solid Alabaster.


    Or for those of you lucky enough to own your own home, how about some Graham & Brown wallpaper? They're selling double rolls for $30 (marked down from $60). Some of their designs are drool-worthy!


    And if you have a wee one on the way, they're about to have a sale on some very cozy looking baby blankets. Perfect if someone is having a fall/winter baby!


    My pillow shams should arrive next week and I can't wait to see how they look on our bed! Mom and I are going to be very busy this weekend, trying to wrap up all the loose ends before Jason gets home. We're actually going to buy him a BBQ grill today! And my mom has informed me that we're going to Bed Bath & Beyond to replace the very flat guest bedroom pillows (our pillows are definitely past their prime--although Jason does prefer flat to fluffy). And I'm thinking that all this grey fall(ish) weather we're having is going to require me to break out the brownie making supplies...

    Hope you have a great weekend whatever you do!


    In the spirit of full disclosure, I have not been paid or compensated by One Kings Lane to endorse their products or website, but if you sign up, not only do you get a $15 credit, but I get one too if you decided to buy something.

    September 16, 2010

    Finally! A focal point!

    I hung shelves on one wall of our bedroom, and wow! What a difference! It really makes the room feel more anchored and balanced, since this wall is directly across from our four-foot tall headboard.


    (sorry. icky flash.)


    (i need to make a runner for this dresser. that pillow case just ain't cuttin' it!)

    When Mom and I went to IKEA over Labor Day weekend, I grabbed a couple of Ekby Östen shelves and Ekby Hensvik brackets to help spice up the decor in our bedroom. A couple coats of paint (I used Behr Paint & Primer in their basic black color) brought them up to our color code. ;) I found the best way to hang them was to drill two screws into the sides of the brackets, rather than try to mess with the Hensvik bracket hanging system.


    (there's one on either side. these babies ain't goin' nowhere!)

    I decorated them using a mix of store-bought and home-shopped items. The bottle on the far left I found at Cost Plus World Market on clearance for $8. It was a mottled cream color, so I gave it my favorite Rub 'n Buff treatment to make it match a little better. The frame was from a bunch my grandmother was giving away (I snatched up a whole lot from her!). The little "&" block is also from World Market, the pillar holder is from IKEA, and the candle is from Micheal's. I must have snagged about 10 of these when I was there. They were on clearance for only $3 each! The red "A" used to be in our office (and it used to be blue). I painted in with Rust-Oleum's Colonial Red, a very rich color which reminds me of my favorite lipstick and nail polish!


    Most of these accessories are from the same place as the other shelf. The only addition is the bunch of wooden roses in the vase (which used be be an ugly purple-ish color before it got its own R 'n B treatment). I bought those one year at our county fair.


    (this shelf isn't crooked--the picture was taken at an angle to deflect the light from the windows.)

    And in case you were wondering, the photos of me and Jason are from a few of our trips. The big(ger) one is us at Graceland, TN. The two smaller ones are us in Multnomah Falls, OR and Las Vegas (NV) ;).


    There's only a couple more things I'd like to do in here, but I'm almost worried that it might be too much. I was thinking of a mirror on this wall...


    (ugh. i need to do something about this blue jewelry box.)

    ...and maybe some wall words on this wall.


    Too busy you think? There would literally be something on every wall at that point. How much decor is too much decor? My grandmother used to say, "Whenever you think you're dressed, take off one piece of jewelry."

    I think the wall words and mirror might be that "one piece of jewelry." Hmm...

    I'm linking up to:
    Transformation Thrusdays @ The Shabby Chic Cottage
    Fresh Coat Fridays @ Life in the Fun Lane
    The Project Parade @ The DIY Show-Off