June 30, 2010

Los Angeles or Bust!

Last week Mom and I took a little overnight trip up to Beverly Hills. We'd both been to and around L.A. before, but this was our first time in The Hills. We stayed at a gorgeous hotel, enjoyed two days of beautiful sunshine, and did plenty of relaxing. We enjoyed ourselves so much we plan to make a return trip with our husbands when we can! Can't always be mommy-daughter day. ;)

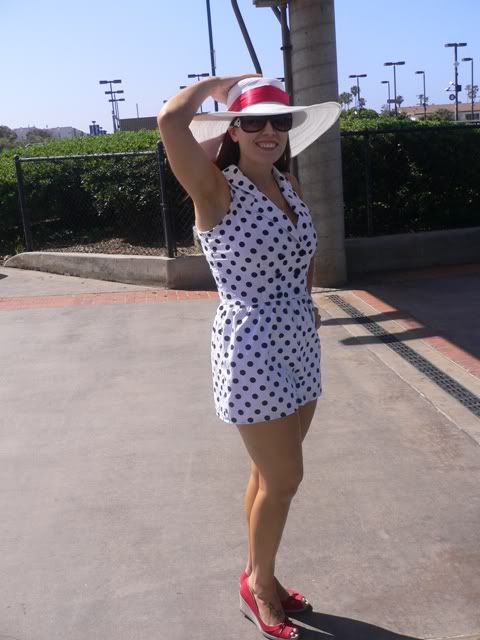
Boarding the train. My new romper from ModCloth was so comfortable to travel in! The fabric was lightweight and kept me cool on the train. Plus, it's so ridiculously chic, how can you not want to travel in it?!


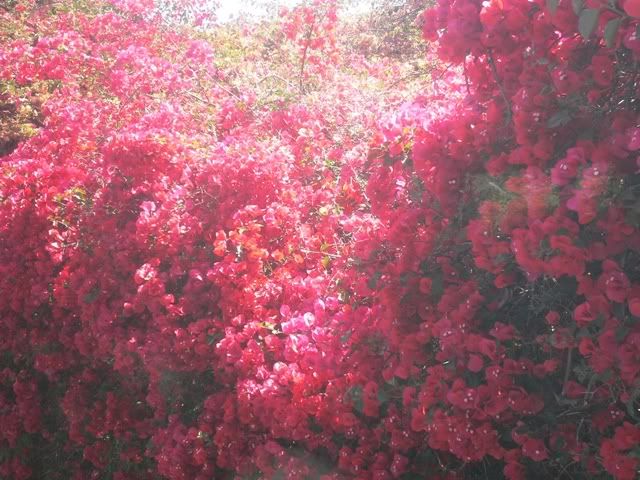
The bougainvillea in San Juan Capistrano was breath taking.


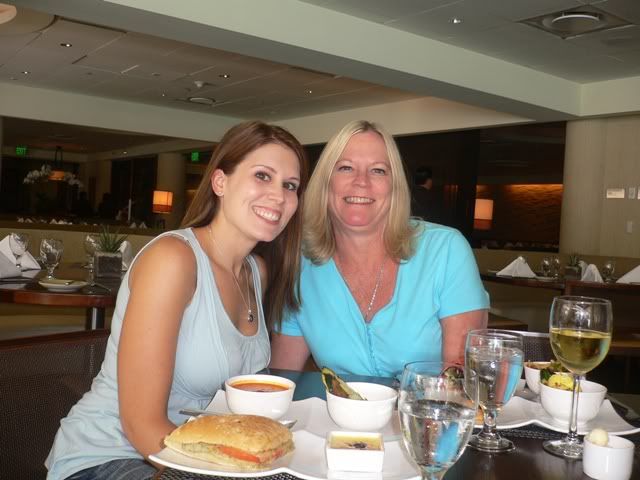
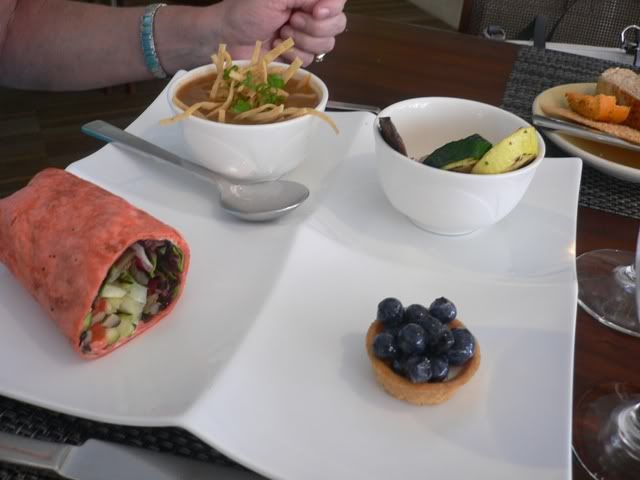
Mom and I enjoying a light lunch. The food was exquisite. We ate at the hotel twice and we weren't disappointed!


(Isn't that teeny tiny tart the cutest thing ever??)


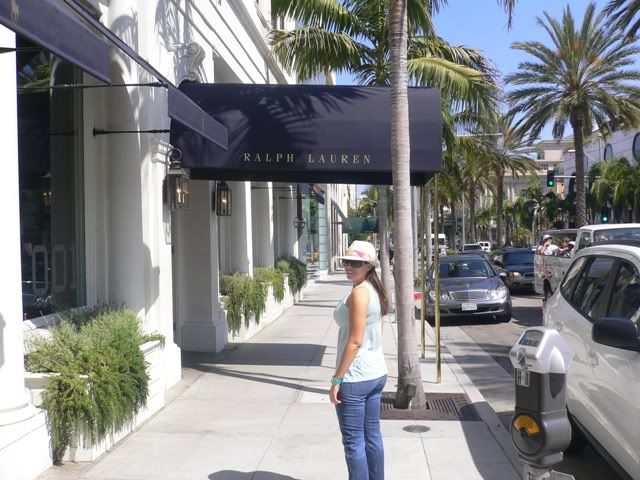
Walking down Rodeo Drive.


Enjoying the hotel's complimentary limousine. ;)


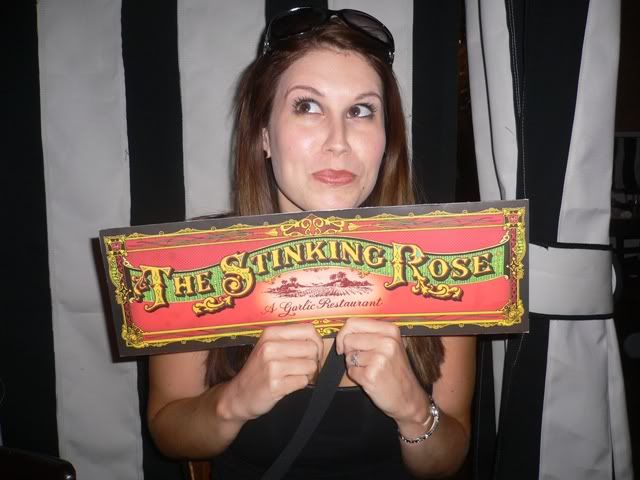
Mom and I ate at this fabulous restaurant called "The Stinking Rose," which is a garlic themed restaurant. Oh. So. Yummy!


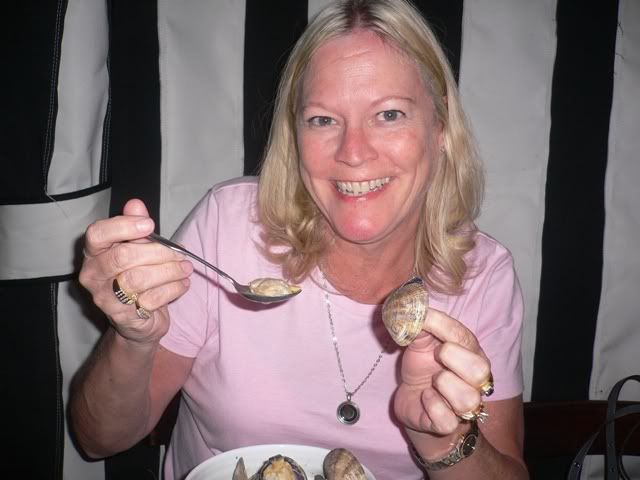
We each ordered a small tureen for our appetizers (Mom: garlic clams, me: garlic and tomato shrimp), and had we not filled up on the garlic bread as well, we probably would have gone for something else before our meals (Mom had the halibut in a lemon-garlic-butter-and-caper sauce, while I had garlic dungeness crab).


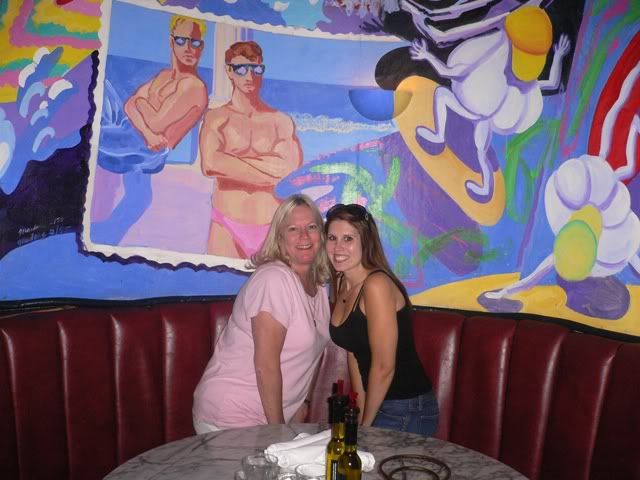
We felt like serious tourists while walking around and taking a bazillion pictures of the murals and rooms!


Coming home and going back to reality was such a bummer. After just two days of everyone opening your doors everywhere you go, I'm suddenly very offended to have to do something so mundane for myself! ;) Definitely gives us something to look forward to doing again!

June 28, 2010

Just another minisode

The series is called, "Amber Can't Keep Her Mind Focused On Just One Project These Days." Okay, so it's a bit of a mouth full. But, hey, I'm getting other things done in the meantime. I think the real issue is I have virtually no DIY funds right now (housing issues--trying to sell the house back in NC, which means no renters and no rental income!) so I'm having to tackle smaller projects that don't use any of our precious resources! This is why I like bathrooms! They're small, they're simple, and few things can make a huge impact!

I stuck to shades of blue and green in this bathroom. Jason picked out the Matine toile shower curtain before he left back in March--I swear I had no input on this one! The man just has good taste! ;)


Finally hung the shelves I bought for the last bathroom mini-make-over. I think I might want to get some sturdier ones down the road though...


The starfish used to reside in the office, but I like it better in here. Kind of like he jumped out of one of the photos.


The mason jar (which also used to reside in the office) is holding eucalyptus bath salts. I love this idea so much I think I'm going to do it in our bathroom with some large clear ones! Move over apothecary jars! Mason jars are the new bathroom accessory (you heard it here)!


The little bath sign was a DIY project using a paper bag for some texture, and I just stenciled and hand painted the letters (hence the less than perfect edges).


And last but not least, a little greenery. I had two ferns that I was trying out elsewhere in the house, but they looked too dental. So I gave them a hair cut and moved 'em! Supposedly, ferns do well in bathrooms since they need to stay out of direct sunlight. I guess we'll see! Since I didn't have any pots, I just spray painted the plastic container in Rust-Oleum's Heirloom White and set it on an old teacup saucer.


I still have a few more things I need to get when budget allows. A trash can, some towels, and maybe a few counter top accessories are in order, but for now, at least it looks pleasant and usable! ;)

June 25, 2010

An outdoor pub

I'm so excited! During one of our recent e-mail marathons, Jason and I started talking about ideas for the backyard. I had been considering more of a beach theme. But when he brought up the fact that the house was getting plenty of "feminine touches" in his absence, he asked me to design a more masculine outdoor area; more specifically, an Irish pub. I love the idea because it requires very little making-over of the furniture. They're going to stay in their original conditions to give it more of a time-worn-collected-over-the-years feel like all good old fashioned pubs have. Only one piece (a white wicker chair) will be getting a little face-lift with a new coat of paint. White wicker doesn't exactly scream "pub."

Of course excitement like this can't be contained, so I had to start working on an idea board right away! ;) Here's the current plan.


The color scheme is going to be black and tan (a nod to Guinness beer) with touches of greens and red-oranges. Other textures will include a chalkboard with pub "specialties" written on them, and some lanterns to keep everything well lit when the sun goes down. Of course we'll have playing cards and some cigars stashed in a side table for when they boys want to kick back and gamble a little, and I also plan on getting a few beer steins with our last name on them (Jason received two from my step-mom one year for Christmas, so I think I need to add to his collection).

I'm looking forward to working on this in conjunction with the bedroom (which truthfully has seen very little action lately). My attention span seems to be on a short leash these days, so I'm breaking my rule and working on several projects at once. First things first, it's time to talk my mom and step-dad into making a day trip over here to buy and set up the canopy! Then I can start building our pub!

June 23, 2010

Bench this, baby!

I could have sworn that I shared these with you, but after searching through my post archives, it looks like maybe I didn't! Back in November, I purchased these art deco bed benches from The Estate Sale Warehouse that I'm constantly endorsing (and, for the record, not being paid to do so).

Now, this is a class-A how-to-take-a-bad-picture example, but the bad flash highlights the many scuffs that these otherwise worldly beauties have on them.


I want to upholster them I'm going to pay a professional to upholster them in this gorgeous fabric that Ballard Designs is carrying (but I have found much cheaper elsewhere!). They call their style "Cantana."


But I have been debating back and forth over what to do about their finish. Did I want to paint them? That was my plan for a while, until I remembered this curvy cutie still sitting downstairs in our dinning room (again, please forgive the huge mess on the dinning room table).


At the time I purchased it, I also faced the same dilemma with this mirror. To paint or not to paint? The wood doesn't have a single flaw in it, and I hate the idea of covering up the warm color. So I had the idea to mix wood tones. It's working surprisingly well downstairs in the few areas I've started on, so I thought why not?

But first I had to make sure my what-looks-to-be-a-cherry-wood-finish-on-them benches would strip down to a natural wood color. So using what little Citristrip I had left, I went ahead and gave 'er a test run!


Hmm... I was very surprised to come back and find that the Citristrip made almost no difference in the finish. So I busted out my handheld power sander and gave it whirl.


Wow! That is some orange wood! I guess the faux-cherry finish isn't so faux after all! Too bad this looks nothing like the warm honey-wood color of the mirror. Okay, so paint it is! I'll find other ways to bring in some more "woodier" tones to match the mirror--maybe some baskets and some faux-wood wrapped candles will do the trick! ;)

June 21, 2010

Meet me in Del Mar

Judy Garland may have had St. Louis and the world fair, but here in San Diego, our county fair is the mark of summer! I've gone to the fair for as many years as I can remember and have never missed a single summer--even when we were living back in North Carolina! I always coincided my trips out here with the fair schedule. I've made my first official trip for the year, but I have two more planned already! ;)

Me and Mom enjoying the sun...


...the flower competition...


...the wood working exhibit (yes, this full-size male lion is carved completely of wood!)...


...the gems and minerals displays (love the jade "peas" in this food display)...


...and marveling at all the fried foods!


Not pictured: chocolate covered bacon (ew!), fried butter (double ew!), and fried Snickers. But I did help myself to a fried Reese's! I hate to admit just how good this really was! ;)


On the next trip I plan to try one of the fried Klondike bars! =D

June 15, 2010

Wall art: what do you think?

I love using vintage prints as artwork. For one, they're unique. For two, they're free! I have these three prints that I'm thinking of using in the master bedroom. Two of them are ferns, the other is purple Scottish thistle. I want to bring a bit of purple into the room for a little luxe-ness (this is the order they would hang in as well).


Do you think these prints/images will work, or should I try to find something a little more--ahem!--sensual and less clinical? What could I use if I wanted to add some more "spice" to our bedroom artwork?

June 13, 2010

Tweet nothings

So I took the plunge and created a Twitter account. If you find my ramblings amusing and would like to know what I'm up to when I'm not here at the Nutshell, by all means, please come check me out! Most likely the thoughts in my insane little mind will make you all question why you actually read this blog! ;)

Follow me on Twitter


June 11, 2010

Curly ivy wreaths? Yes please!

When I went down to IKEA last week I was planning to only spend $50, but walked out with a bill of $107.50--whoops! Along with the curtains for our master bedroom, I grabbed a couple of their silver pillar candle holders (also for the bedroom) a lazy Susan for our dinning room table (working on a table scape, piece by piece), and then I saw these great little wreaths that were on a "last chance" end cap. They were priced as $2 each and I absolutely loved the little curlicues they had coming off of them. So I grabbed three! ;) I think one's going to go in our bedroom, and possibly another outside once I get that set up. But the first one was going to go on our door!


I made one of my little wooden signs and attached it with jute twine to the wreath so it's easily removable. This one says "Blessed Be" in Gaelic (isn't that font adorable? I love that it matches the ivy's curlicues!). Now I'm thinking I want to remove it and find a nice rusty horse shoe, or make it a little more seasonal.

That's may favorite thing about them: their simplicity and how easy it will be to dress them up in different "outfits!" I could find some shells on some floral picks and tie a pencil starfish in the center; or some red and blue flowers in the ivy with a little American flag for Fourth of July; burlap strips and starfish; small citrus fruit picks--and that's just summer!

So if you have an IKEA near you, go grab a few before they're gone! I'm looking forward to lots of projects with these in the future.

June 9, 2010

I ♥ summer shopping

What is it about summer that makes shopping so much more fun?! I've been trying to keep up with my recent weight loss (I'm down to 117 pounds now people! I finally match my driver's license!) by buying belts to hold up my old jeans, but I'm actually getting to the point where this won't be a solution much longer. Today, I broke down and bought my first new piece of clothing: a romper from ModCloth (in a small no less! I've never been a small!).


I've been wanting one for a while now. Ever since they started coming back in style I knew I wanted to add one to my wardrobe. But finding the right style was proving to be difficult! When I saw this adorable little polka dot number, I knew she was the one!

Now I'm on the hunt for the perfect red wedges to go with it (what is it about black and white and red together?)! Our county fair starts this week, and I have many a-visions of sporting this little number on those long hot trips. My little sister has even talked about going to opening day at the (pony) race tracks, so I have a feeling this would work there too!

Of course, I'm not shopping for just me! One of my friends just had a baby boy and I spent like, $60 on onesies for him! Jason and I may not want kids, but we love to shop for and spoil other people's babies!

My friend has always been the "life of the party," so this one was a must!


Literally, "Danger" is his middle name!


His daddy just got a t-shirt with retro playing cards on it for his birthday. Figured the baby could use one too!


Did you expect anything less from an Irish girl to her Irish friend? ;)


There's about a bazillion more that I want to buy him, but I think I should probably wait a little. I can't wait to get these so I can wrap them up in some super cute packaging (but it will not be all cutesy-cutesy-baby-like, it's gotta match the gifts inside). I may try to find some little punk-rock pacifiers and accessories too, so if anyone has some good sources, please pass them along!

Today I'm going out with my mom, aunt, cousin, and twin one-year-old cousins for a girls' day! Bet you can't guess what I wish I already owned? ;)

How 'bout you?? Please tell me I'm not the only one splurging on my summer wardrobe! =)

PS: My latest short story ("Birthday Sex") is up on The Escritoire! You can check it out here.

June 7, 2010

Start simple; hang 'em high!


- Pull weeds

- Light house cleaning

- Finish sorting vintage silverware

- Hose off patio furniture

- Date with Tony & Katie


Hanging pool side over the weekend. (Can we tell how productive I was?)


I've come to realize that window treatments really do make a room. Even if it's something really simple. When I was working downstairs in our living room and hung my first PVC-pipe curtain rod, I was blown away at how just the rod seemed to anchor the room. Ever since then I couldn't wait to rip the old IKEA Index curtain rods from the walls in our bedroom. So that's where I started!

While I was out picking up supplies from Home Depot, I swung by Wal-Mart to check out their sheet options. I'm a huge fan of using bed sheets as curtains, especially when you can find them on the cheap. Plus, their length, fullness, and ability to filter light without blocking it completely makes them the perfect alternative to twenty-something-dollar-apiece panels that barely cover your windows. Unfortunately, Wal-Mart had nothing! All of their flat sheets were about $11 a piece, and since the Vivan curtains I had my eye on down at IKEA were only $13 for a two pack, there was no doubt which was the cheaper more budget friendly option!

So, while I supposed to be pulling weeds (heh) I decided instead to drive on down to San Diego and get some curtains. I rationalized to myself that the rods had been hanging empty for so long now--didn't they deserve a little company? Besides, when I walked outside to pull weeds I discovered a whole host of dirt mounds that looked a little freaky. A phone call to the housing office netted that they were probably gopher holes, but until someone comes out and verifies that, I'm not going near them!

Anyhoo, I started by hemming the curtains using the iron-on hemming tape that comes in the package. Now, IKEA recommends cutting them once they're hemmed, but I'd like to use these in another house down the road, so I just pressed the edges and kept all the extra fabric. Besides, it gives the bottoms a bit of a billowy look, and that's fine by me!


Once they were all hemmed (I brought them up about 5-inches), I tossed them in the dryer to get all the wrinkles out. Nothing worse than hanging creased curtains! After a quick cycle, I hung 'em up! I can't decide if I want to keep them in the rod pocket, or the hidden tab style...


They still have a few wrinkles in them, but at least they don't have that fresh-outta-the-package look to them! I'm anxious to start working on our bed, but just having new curtains up already makes the room so much more relaxing. There's just nothing I love more than the sight of white curtains blowing in the breeze.

PVC-pipe curtains rods: a tutorial

SUPPLIES:
  • PVC pipe (I prefer 3/4" but choose your scale according to your project)
  • Brackets (I use these from Levolor, in white, and they typically come in a pair)
  • Finials (I also use Levolor finials because they're just about the perfect size and come in an array of styles, also in white, and they also come in pairs)
  • Paint
  • Hot glue gun
  • Cordless drill
  • Screw driver
  • Tape measure (I also use a yard stick to help me measure)

    When you purchase your PVC-pipe (which is in the plumbing department, just FYI) it normally comes in either 10-foot or 20-foot lengths. If you don't own a truck that can accommodate these sizes, no worries (have you seen my little car?) because you can cut them right at the store. Find an associate and have them help you because it's much easier.

    However, you can also cut them at home using a jigsaw or a PVC-pipe cutter if you own one. Just be careful not to get too anxious with your cut and snap the PVC-pipe in half because it will not snap with a straight edge! But if this happens--like it has to me on numerous occasions--it's fixable (and we'll get to it in a sec).

    Start by priming the pipe, if you choose, or skip straight to painting. I've found a great technique and time saver is to just use a flat finish paint. It eliminates the need to prime and I love the finish it gives the pipes.


    Repeat these steps for your other "rods," brackets, and finials. I use the flat black on everything else as well to keep the finishes similar.

    TIP: When painting your finials, use a box to hold them upright. Don't worry about the undersides yet. Once they're dry, stick them into the sides of the box to get all the other angles easily and without causing drips.


    Once everything is thoroughly dried, you can start gluing the finials on the ends of the brackets. However, if you're using grommet drapes, curtain rings, or anything else that is limited in size, put them on before you glue the finials to the ends. You won't be able to get anything over the finials.

    Moving on though, don't be stingy with your hot glue gun. Once everything is hung you won't be able to tell if you used an entire stick on a single finial. Be sure to press the finial to the end of the rod and hold it securely until the glue has hardened. Repeat for the other side.


    As I mentioned above, if you happened to get too over zealous and snapped your pipe, you're probably looking at something like this right about now.


    Ugh, I know: frustrating! Take my word for it, you cannot just hot glue your finial on the end and cover it up. The finial will rock back and forth until it falls off as well, and then you'll be genuinely displeased! But, there's a super simple way to fix this. Hot glue to the rescue! Simply take your hot glue gun and fill in the space between your even edges and your valley. It make take a couple rounds but if you take your time this will work. Just make sure you rotate the pipe to keep the glue from dripping inside or outside. Once it's cool you should have something resembling this.


    You can see how the different amount of glue filled in the space to even everything out. Now just glue on your finial as before.

    TIP: To prevent the PVC-pipes from sliding around when you pull your curtains this way and that, add a generous dot of hot glue to the rod holder and let it harden. The glue will grip the plastic and keep in from moving around.


    Next, hang your brackets. Depending on what brand and type you bought, your installation methods will vary, so I'm not going to do a step-by-step for this part.

    Now all you have to do is hang your curtains! I've used this method in our master bedroom...


    ...our guest bedroom...


    ...and our living room. I think I've saved well over $200 by choosing this avenue versus regular curtain rods!


    Hope this helps you save money on your next window treatment project! Happy hanging!
  •