December 31, 2009

end of the year round up

Here's hoping the New Year finds you happy and healthy! And while we assemble our office, here's a look back at some of my favorite posts from 2009! (Click on the tiltes to go to the post.)

Amber Bakes a Cake


. . .

The Big Promotion


. . .

City of Angels


. . .

Sold!


. . .

Viva Las Vegas! (parts one, two, and three)


. . .

M-i-c-k-e-y M-o-u-s-e!


. . .

Out With the Old, In With the New (House)


. . .

One-Ninty-Nine & Looking Fine!


. . .

The Tilted Kilt


. . .

My Recipe For the Perfect Red Lipstick


. . .

Birhtdays & Baseball


. . .

Three Hour Tour


. . .

Seaside Highland Games


. . .

It's Done!


. . .

The Aftermath


. . .

I'm Dreaming Of An (Heirloom) White Christmas (parts one and two)


. . .

See you in 2010!

December 28, 2009

amber's tips for shopping at IKEA

Yesterday, Jason and I ventured out to spend some of that (not so) hard earned Christmas cash. Neither of us was feeling up for the gym, so we made up our cardio by spending almost five hours at Ikea! Let's just say, in those five hours, I developed some real good tips for braving Ikea on a holiday weekend. Hopefully, they'll help you too! In no particular order...

Amber's Guide to Surviving IKEA During the Holidays

Make sure you have time to spare.
Keep your sanity! Don't go to Ikea expecting to be in and out in 10 minutes. For one, there's too much eye candy. For two, the store is usually crawling with people, and any power walking results in banging into people with your cart (like I have--oops!). Now, obviously, you don't need to dedicate five hours to Ikea like we did (that's just how long we like to soak it in); but give yourself at least an hour, especially with the holiday crowds.

Ikea inventory is online for a reason--use it!
This is one thing I wish all other stores would implement (just like I wish they'd all adopt Home Depot's customer service button in each department). Each item online gives you the opportunity to check its availability at your local Ikea.


Which leads to my next tip...

Hit the "Market Place" and "Self Serve Furniture" areas first.
Depending on what the hot item is, you may or may not have to worry about your desired piece of furniture still being there when you make it down to the warehouse. However, unless we're just on a browsing and accessorizing trip, we always hit the pick-up floor first thing, pay, load up the car, and re-enter Ikea with the knowledge that our coveted items are now safely ours, and we can take our time browsing the rest of the store.

Know what you're paying for.
As you can see above, the Allak chair is going for $70 online. When we picked it up from the bins, it was marked as $80. Not a huge difference, but we were disappointed in the $10 mistake--after all, that can buy a lot at Ikea! While we were browsing (after our first round through the cash registers) we came across our chair to find on the display floor it was also $70! We marched right over to an associate and whipped out our receipt. Turns out, it was a mistake and we received the $10 difference back.

Enjoy yourself!
Have some lunch, take in the sights! Ikea is meant to be a delightful experience...until you get home and have to assemble everything that is! ;)

Stay tuned for the goodies we came home with!

December 26, 2009

finally!

After almost two years of telling myself that I was going to buy a sewing machine, I finally got one--as a Christmas gift from my sisters and step-mom.


(Look at that paper fly!)


(Note the old school Nintendo over my right shoulder--my sister's gift to her boyfriend.)

Not only that, they loaded me down with some amazing accessories (box of bobbins, anyone?)! One of my favorites was the package of customized labels they had made for me. I can't wait to sew one onto the first project I complete (I don't care if if it's only a satchel! I'm sewing one of these babies in)!


I'm thinking my first project is going to be three throw pillows for our bed. I picked up these gorgeous throws at Pottery Barn, on sale. I just love the colors (and the small hint of a four leaf clover in the center)! I was lucky enough that Jason also liked them--thank goodness because I'd already purchased them!


I've been looking around for complimentary throw pillows, and was actually going to buy two of these large euro shams and the little blue pillow from Bed Bath & Beyond. I thought it would be one of those doesn't-really-match-but-still-goes-together kind of looks.


But when we got to BB&B I was horribly disappointed. For one, the large grey pillows are $50, a price I was already choking on. But come to find out the price is for the covers only! And nowhere on the site does it say "sham only" or "does not include insert." So I would have been furious if I'd dropped $100 on two pillow covers. The little blue poppies pillow was also rather expensive at $40--and it looked so cheap! Don't get me wrong, I will spend money on something if it's worth the price, but these pillows were not worth their price tags.

Rather I decided to go with something simple and yes, a little matchy matchy for our bed.


I've always loved Pottery Barn's textured linen pillows, but again, cannot justify spending $25 for the cover alone seeing how they're so basic. I think the style is fairly easy to replicate, it's not too challenging for a beginner, and all I really need to do is find the right kind of button for the clasp.

I'd still like to find another fabric that maybe ties all the colors together--like a white, yellow, and green plaid. Or even a yellow, green, and blue plaid so I can introduce a new color into the room. I'm really loving greens right now and yellow and blue are my go-to accent colors, along with grey, black, and white.

I found these on etsy, but I don't think they're quite what I'm looking for. Maybe if the background was more white than cream.


Anyhoo. Those are my thoughts! So how was your Christmas?

December 25, 2009

have yourself a merry little Christmas

From our home to yours, Merry Christmas.


I leave you with the one and only Judy Garland from Meet Me in St. Louis, the only female I've ever loved singing this song.


December 22, 2009

file this one under "office"

With Christmas only days away, Jason and I are both ridiculously excited for all the after Christmas shopping we plan to do! Our big ticket items? Our desk and our second bookcase.

After months, nay, almost a year, with a hand-me-down industrial desk we got for free from my step-dad, we've finally found one we like. We debated heavily on what we were going to get. Something I built? Something we found at a thrift store and refurbished? While both these ideas were forefront runners for a long time, we were unable to a.) find a desk we liked enough to refurbish and b.) had a lot of bad luck buying table legs. Deciding the DIY-universe was against me (I could see myself chopping off a finger along the way), I sat down and laid out a new plan.


1. Markör bookcase from Ikea, lined with 2. Martha Stewart wrapping paper in Granny Smith and Pea Shoot 3. Kassett storage boxes from Ikea to go into 4. our new Expedit work station 5. The greens and blues offer a lovely contrast and compliment to the yellow toile and ticking stripe fabric for our reading chair from Fabric.com.

All that's needed are a few accent pieces to tie the colors together throughout the room. I'm absolutely in love with the dark furniture (which we have always favored for some reason) and the fresh pops of color.

I suppose now all we need is a good office chair, huh?

December 20, 2009

new! new! new!

I'm so excited over the new updates--it truly proves what an absolute nerd I am, just in case you had any lingering doubts! First, I updated my AUTHOR section with the link to my other site, The Escritoire. So if I've hooked you with my astounding writing capabilities, you'll know how to find it.


Second, there's been an addition to the navigation bar!


I've started a TUTORIALS section! It's still in its infancy, with only two articles in there as of now. But I hoping that as I start completing more and more projects I'll have more to add. I may even throw in a few before and afters just for good measure!

If there's something I've done in the past that you'd like to see a tutorial on, please let me know! I'd be happy to create one!

December 18, 2009

the latest

The results of my latest photo shoot. They're more on the professional vibe with the white screen set up. ;)


December 17, 2009

it's not Christmas unless...

Centsational Girl challenged her readers to list what their Christmas traditions were. I loved the idea so much, I wanted to extend it past her comments section and into my own blog.

So, it's not Christmas unless...
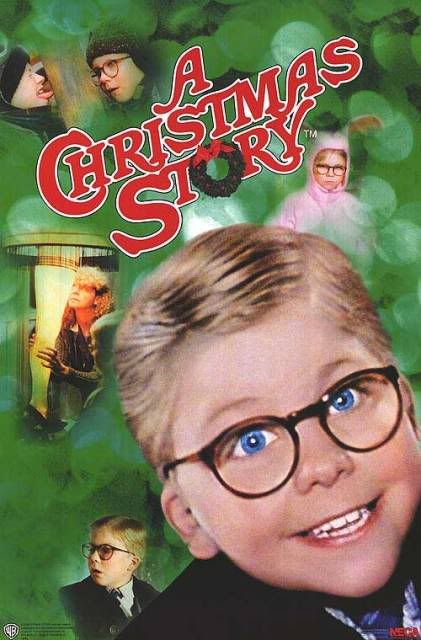
1. I watch "A Christmas Story" for 24-hours on Christmas Eve. God, Jason hates this movie! But I love, love, love it! I put it on when I'm wrapping gifts, feeling blah, or this year we even had it on during Thanksgiving for everyone to watch. It just gets me into that Christmas spirit. And since we don't have cable (we got rid of it years ago) I just stick in my DVD and fire it up! Christmas Story all Christmas long!


2. I buy a whole thing of eggnog, and only drink half of it. Another thing Jason hates (he's quite the Scrooge, isn't he?). I love the idea of eggnog, but once I get that quart-sized jug in my refrigerator it seems difficult to drink it all by myself (I buy the lactose-free kind, just in hopes that one of these years my husband will change his mind). Maybe I'll have to start partaking in Starbucks Eggnog Lattes instead!


3. I have some sort of Christmas scented air freshener. In 2006, when Jason first deployed to Iraq, he was gone during Christmas and wasn't home until March. I bought a faux-tree so that we could celebrate when he got home. Because of this, I lost that "real tree smell." This year, I finally reclaimed it with Bath & Body Works Wallflowers and candles in "Fresh Balsam." Whew baby, it's like a Christmas tree exploded in our house. I'm in pine scented Heaven. Give it a try--it smells like Vaporub in the jar, but it smells amazing in the air.


4. We send out a super cute, super cheesy Christmas card. Some years we go for the silly joke cards, others we send out newsletters. This year, we chose to go for a beach themed holiday card. Hey, we live in California. No point pretending we get all bundled up for Christmas!


(The dotted lines are not on the final cards.)

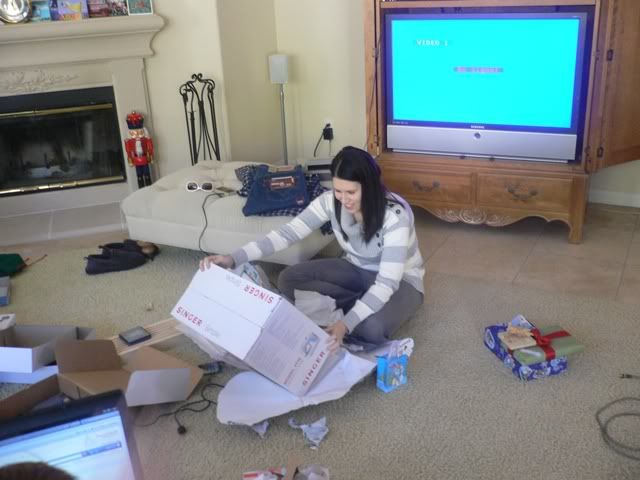
5. Jason and I give each other practically all our Christmas gifts...before Christmas! We are so bad about this! One year we were way ahead of the game and had all our Christmas shopping done by September. By Halloween we'd given each other all our gifts! This year we're doing pretty well. We've only handed out three gifts to each other. It looks like we might actually make it to Christmas Day with presents still under the tree!
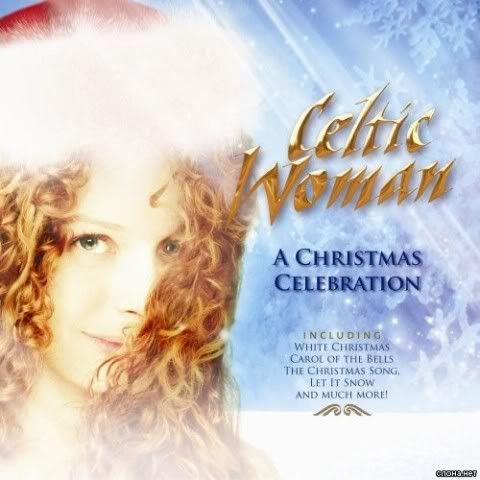
6. We listen to Irish Christmas music. Celtic Woman is our favorite band for this tradition (Jason really wants to see them in concert, but man the tickets are expensive--$250 for regular seats!). The songs we love most right now are "Ding Dong Merrily on High," "Carol of the Bells," "Greensleeves" (one of my most favorite songs ever) and the first verse of "Silent Night--" they sing it in Gaelic! So gorgeous.


7. I have my husband and my family together. I admit, this one doesn't always happen. For a while I got either my husband or my family, but not both. This is only the second year that I will get both of them. Jason's home, we're in California, and all is right in my little world. :)

So whatever your Christmas list contains, I hope this year you get everything you need to make it the perfect Christmas in your house!


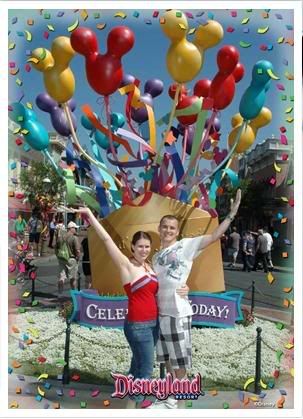
(Jason & me last Christmas, celebrating with English Christmas Crackers--maybe we'll have to do this again this year!)

December 16, 2009

shameless plug

Just because it's the other big project I'm working on, I have to direct you to the full first chapter of my book which is now posted on The Escritoire.

"Cammie Greens & Inked Marines: My Love Affair With the Corps," Chapter One.

Other non-DIY project are happening right now for me as well, and I really want to share them all with you. But for now, they remain my little secret! ;)

December 13, 2009

the next project (what are your thoughts?)

When I noticed this, I told myself, "You're just being type-A. No one else will notice that small smudge that looks like a thumb print. Even though you paid almost $300 for this table, someone couldn't keep their hands off it long enough to let the stain cure. But whatever."


When I saw these I thought, "Well, you've had it for nearly three years, it's been through four moves. If it gets much worse, you can just sand all the edges."


But when I saw these, I knew something more drastic was needed. (Note: if you happen to love Bath & Body Works Wallflowers, the oil will remove the stain from your wood pieces if you happen to let them leak onto the surface.)


About a month ago, I bookmarked this feature from The DIY Show Off. In it, Roeshel featured blogger Miss Mustard Seed (is that not the cutest name?) and some of her amazing before and afters. I immediately snagged two of them for my ideas folder.


I love the two toned tables. Now of course, I would be doing just the opposite--white on top and black on the bottom. Some opinions I've garnered have said the coloring won't quite work with my coffee table.


But at this point, what have I got to lose? I either paint it, decided I don't like it, and sell it, or I just try to sell it with all its blemishes. And since it's still so young, I'd like to hang onto it a bit longer. I think I have most of the necessary tools around the house, which is handy since I have zero DIY money due to the holidays! ;)

Now, do you think, since I'm hell bent on doing this either way, that I should go ahead with my original plan (white top, black bottom) or should I make like Miss Mustard Seed and do the white bottom and black top? Or--something else completely? I'm totally open for opinions!

Oh--I should also mention that this coffee table will be going with white couches, on top of a chocolate brown jute rug (scored at Ballard Designs Estate Sale)! Call me crazy for pairing black and brown, but eh! ::shrugs:: ;)


December 11, 2009

booked.

No. I haven't dropped off the face of the blogging universe. I just have ab-so-lutely noth-ing to report! LOL. I haven't done a single project aside from hanging a few strands of Christmas lights, wrapping presents, and finishing up our Christmas shopping. I'm hoping that Jason and I will be working on one of our projects this weekend, but it won't be anything I can share with you for a while. With holiday spending, it kind of cuts into my DIY fun. :(

On the other hand, it's given me plenty of time to work on my book! I swore I was going to have it finished by the end of this year; now I'm just hoping to have it finished by May! Unfortunately everyday life tends to get in the way of my polishing it (most of it is written, now it's just going back and filling in the gaps and making it flow).

If you haven't ever checked out my sister site, The Escritoire, please do. I don't post as often as I do over here, by I did just post a new story yesterday (definitely one of my more fanciful ones).

In the meantime, I promise to try and make my life more exciting so I have something to report on! ;)

December 9, 2009

Chistmas ornament tutorial


This is a great way to do a holiday make-over on little or no budget! You can use this on glass, plastic, and metal ornaments.

SUPPLIES:
  • Ornaments on hooks--please don't use Grandma's heirloom ornaments for this! You can buy simple ornament packs at Wal-Mart for around $5.
  • Spray primer, like Rust-Oleum's 2x Primer
  • Spray paint in your choice of color(s)
  • Gloves
  • Boxes, dowels, and drop cloths for your work station

    Grab your drop cloths, boxes, and dowels and set up shop. I ended up using garden stakes in the place of dowels because I wasn't smart enough to buy more than one.


    Hang your ornaments off the dowels at each station.


    Give each ornament a light spraying of primer--don't get too heavy, or else you'll end up with massive drip marks on your ornaments (and yes, I have a few like that on my tree). It's easiest if you have the space to move around the work station to hit all the angles. Note: Don't worry about getting the underside at this point. We'll do that in a later step.

    Let dry thoroughly.

    Once the primer has set, slip on your gloves, grab the top of the ornament and swing the bottom end up. Spray lightly with primer. Note: this is why you want gloves. Otherwise, your fingers will be six inches thick with paint by the time you finish!


    (Forgive the lovely cotton ball on the arm. I'd just had blood drawn.)

    Again, let dry thoroughly.

    If needed, you can do another coat of primer. All my ornaments were either a light shade of gold or some shade of silver so one coat was enough. I've noticed green ornaments seem to need more than one coat of primer.

    Repeat this process with your chosen paint color (I used Rust-Oleum Heirloom White). I cannot stress the importance of letting everything dry all the way through. Yes, it makes the process much longer, but you'll be happy when your ornaments come out looking all pretty and flawless.


    Now, hang on your tree and enjoy!


  •