May 25, 2010

Sex and the City 2

Yep--these were the tickets I won on the radio! Last night Katie and I were "Carrie'd" away into a life of glitz and glamour as we watched in awe the fabulousness that was Sex and the City 2. I was even interviewed while waiting in line! I'm hoping she'll have the video up soon so I can link to it. I have a horrible case of laryngitis, but thankfully I still sounded okay enough to talk! ;) Today is another story though... Either way, Katie and I had a blast! If there was one thing I wish I could have changed it would be this: the theater should have enforced some sort of dress code. Some how it seemed criminal to be watching Sex and the City in the same room as people wearing sweat pants and baseball caps. ::shrugs:: I guess that what reminds me I'm in San Diego, and not New York!

From the Movie Maven's website. This was only 4:45. The doors didn't open until 6:30.


Yours truly. You better believe I was sportin' my Manolos! They're not the "it" thing in this movie, but that doesn't make me love them any less!


Katie. I love this shot of her--she looks so excited. We called this shot her "I'm a little teapot" pose!


The lines were long...


But we were officially getting in!!


Belly dancers in the lobby to coincide with the girls' trip to Abu Dhabi.


Sipping sparkling diet green tea from my Sex and the City 2 martini glass (this really was criminal! Where were the Cosmopolitans?!)


Quick! Let's take one more Facebook picture before the movie starts!


Now if you'll excuse me, I need to go devour a bag of throat lozenges.

May 20, 2010

Nothing "master" about it

Our poor neglected master bedroom. When we first moved in together, we ran out and bought a huge (huge) Asian-inspired bedroom set. A ginormous sleigh bed, a dresser, an armoire, and a night stand. Matchy-matchy-matchy-matchy! It stayed with us until we moved to 29 Palms last year and we were able to sell it to a local military couple. Then our room looked like this.


Oh. So. Sad. No dressers, no night stands, not even a bed frame! Our TV was sitting on the coffee table that is now in our living room! (My sister is quoted as having said, "Wow, Amber. That looks like an HGTV before room!" Ouch.) We finally purchased new dressers, but on a much smaller scale. We learned the hard way (courtesy of our Titanic-proportioned former bedroom set) that when it comes to military housing smaller furniture is better!


(Don't mind my childhood baby doll on the chair!)


Then we moved to our current house, added a couple of white night stands from IKEA, some black "curtains" (actually made out of sheets from BB&B), and that was pretty much it. Our "master" bedroom has remained like this for the past six months.


I hope to remedy that shortly! Here's my inspiration board.


As you can see lots of light airy colors, greens, browns, whites, and the touches of black from our furniture (our nightstands are getting a makeover). Jason and I have decided we want something very relaxing and very un-matchy-matchy. We're going for a flea-market-farmhouse-vintage-spa-resort feel.

PLANNED BUDGET
  • Bed/headboard (DIY) - $100
  • Fabric (various) - $150
  • Hardware (Home Depot) - $50
  • Window treatments (Home Depot & IKEA) - $60
  • Paint (Home Depot) - $10
  • Bedding (Pottery Barn) - $200
  • Décor/misc. - $75
    TOTAL: $645

    The budget is a liiiiittle higher than I was hoping for, but I'm hoping I can still get close to that $500 mark when all is said and done. It's going to require lots of thrifting, eBay-ing, Overstock.com-ing, lots of furniture refinishing, and a lot of thinking outside the box. I'm off to Home Depot to spend one of my birthday gifts (yes, that's right, I asked for Home Depot gift cards!) and I plan to start working this very afternoon!!
  • May 18, 2010

    The guest bedroom

    Jason and I had no guest room to speak of before this project. We've been married for four years, lived away from our family for about three of those years, and everyone always had to sleep on our pull out sofa. But not any more! May I introduce you to the newest addition to The Nut Shell.


    Quite different than what I had planned, huh?! A lot of thought went into the variation of the original idea I had for this room. And most of it had to do with the budget.


    That's almost a $600 difference! I think I just freed up enough money for another whole room revamp! By buying a traditional full sized bed versus the daybed, I cut a large chunk from the expense. Not only on the bed, but on the cost of two mattresses for the bed and the trundle. And I'm very glad with my decision. I love the vintage feel of the iron bed so much more than the daybed. The lace "quilt" helps to soften all the metal (and is actually a vintage table cloth passed down to me from my grandmother and my mother).

    I am so pleased with how the room turned out, and it has actually inspired me to try and complete the remaining room make-over (the master bedroom) under $500 as well. Is it going to be a challenge? You bet! But am I up for it? You know it!

    You can find my tutorial on how I made my Pottery Barn-inspired mercury glass lamp here, and stay tuned for a tutorial on PVC-pipe curtain rods!

    May 16, 2010

    Knock-off Pottery Barn lamp

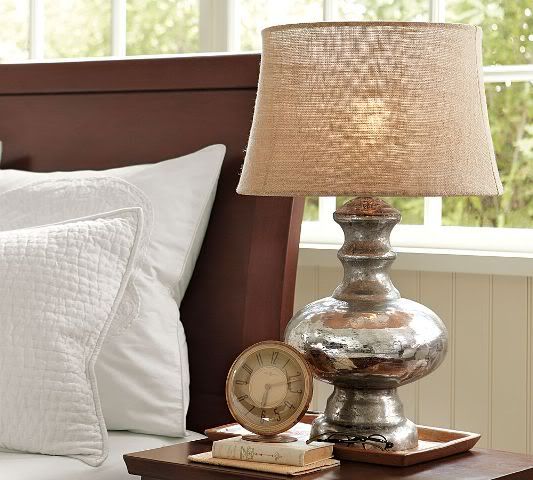
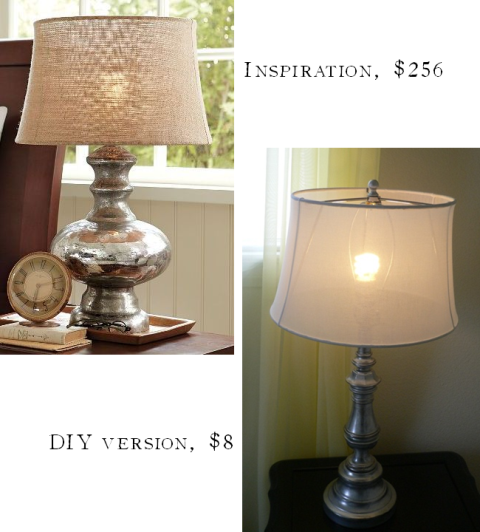
    Ever since I saw this lamp from Pottery Barn, I couldn't shake the image from my mind. The curvy mercury glass was so pretty and the light bulb visible through the unlined lamp shade gave it a somewhat playful appearance. I loved the effect!


    What I didn't love (as usual) was the price they were demanding.


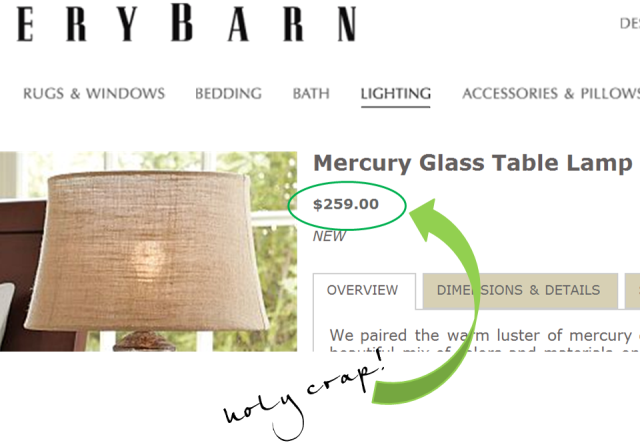
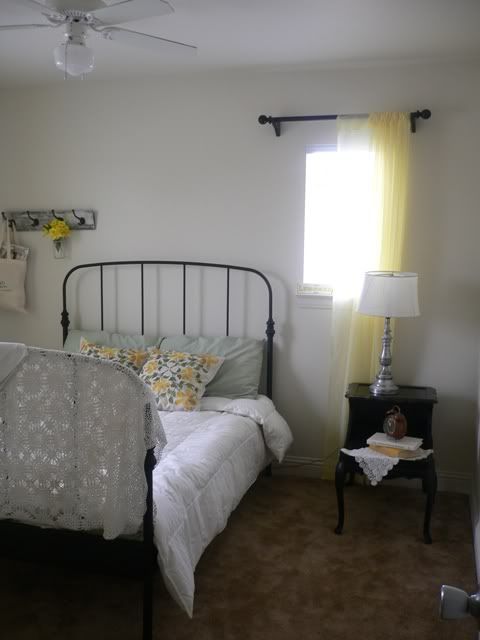
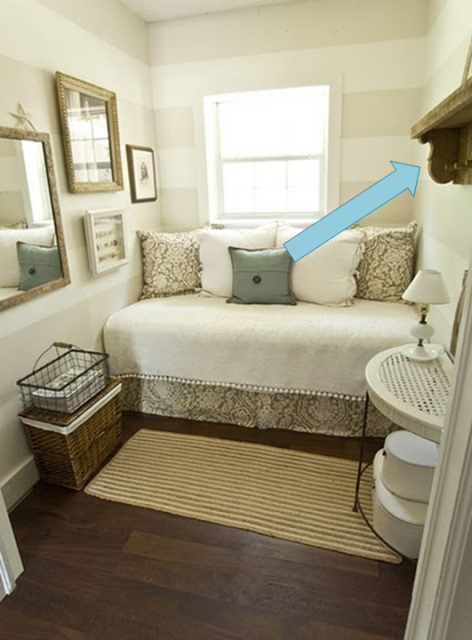
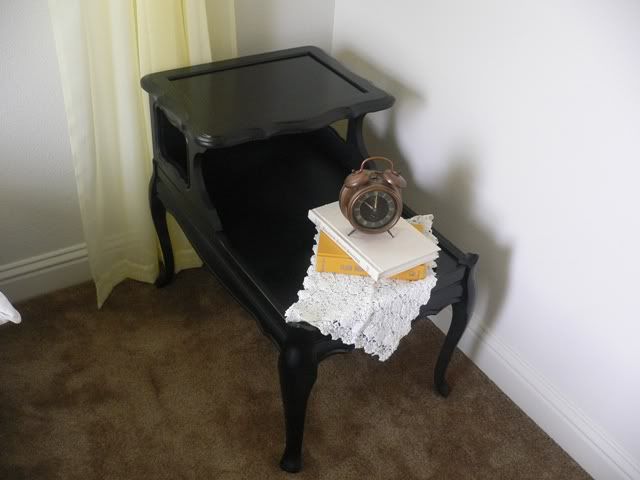
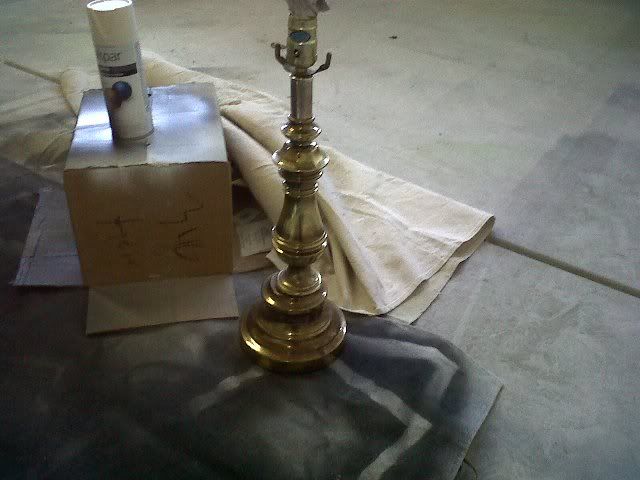
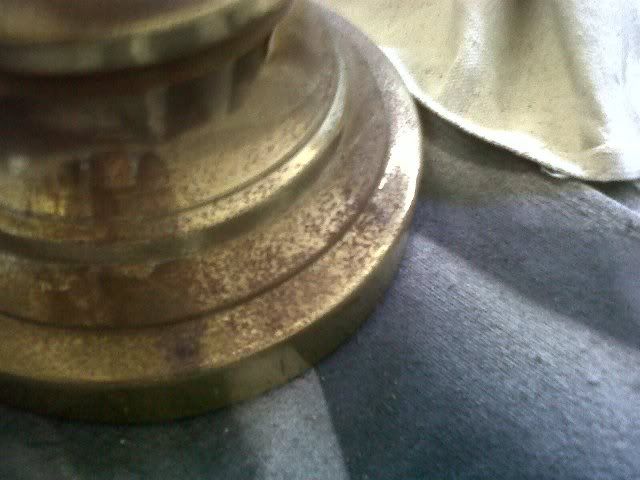
    No matter how much I loved it, I knew I couldn't get on board with that astronomical dollar amount. So I sort of put the idea of owning it out of my head. Fast forward to last week when I was at the ESW looking for Mother's Day gifts and a lamp for the guest room. I found a real cutie--the perfect size for the top story of the night stand--for a whopping $4. It was very brassy and tarnished as you can see.


    A coat of primer made a huge difference, but from here I was at a loss for what to do.


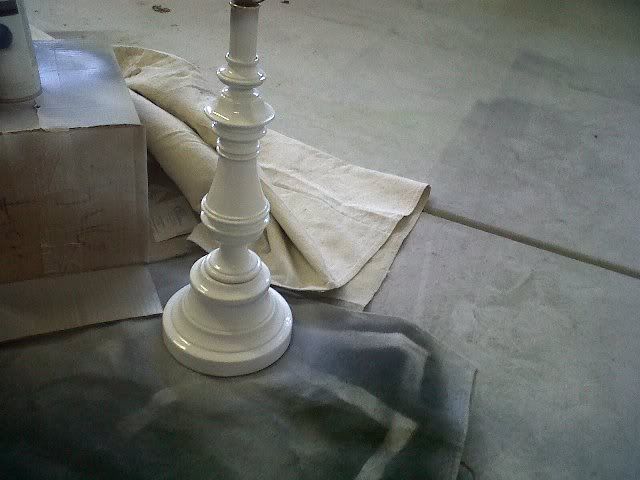
    Then I remembered the oh-so-coveted mercury glass lamp. But how could I achieve that look?! Roeshel had great success with her mercury glass pumpkins by just using silver and brown paint, but I wasn't sure if I could recreate that look on the lamp. Then, out of the far corner of my mind came this idea.


    No, that's not spray paint and it's not silver leafing. It's a product called "Rub & Buff." I'd seen it used by Gina at The Shabby Chic Cottage, but she'd used their "Patina" formula. I used their "Silver Leaf." I had no idea what the heck I was doing, but at only $4 it was was cheaper than silver leafing and a 
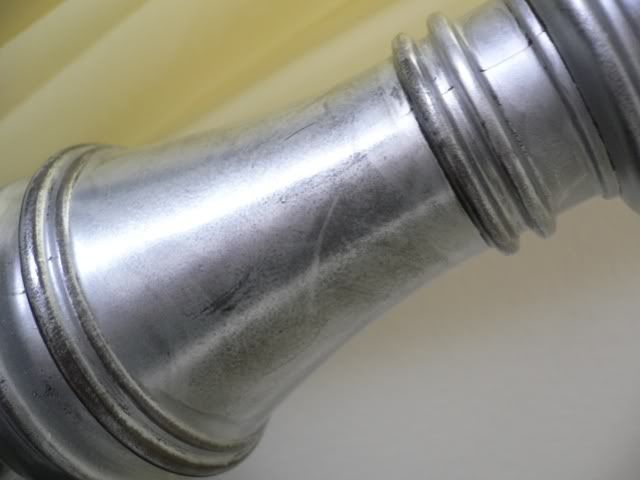
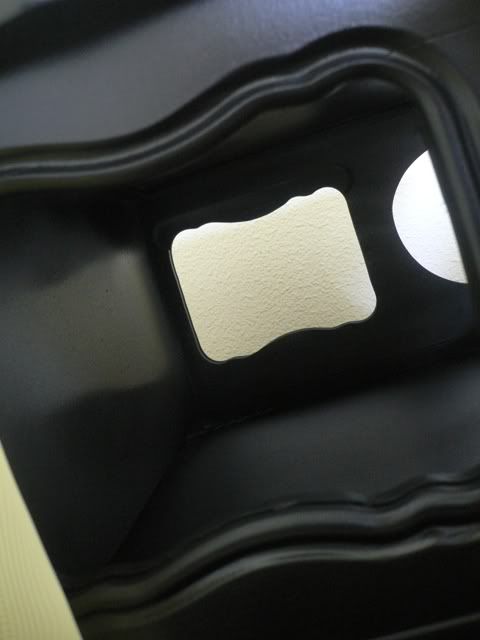
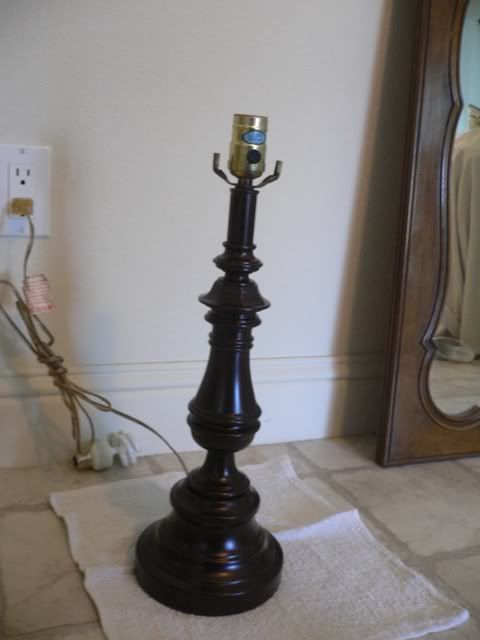
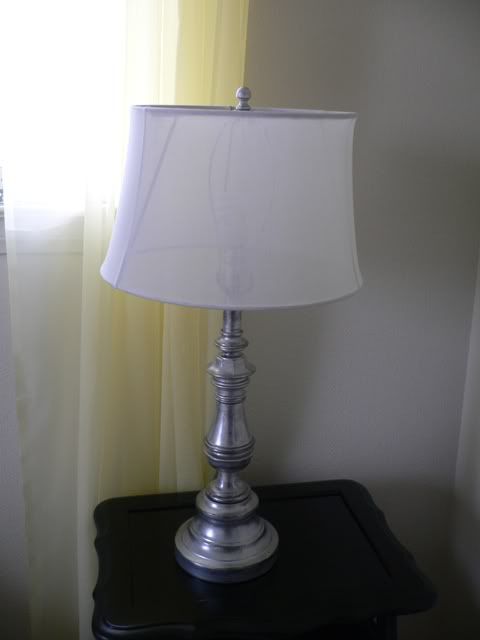
whole lot easier (I had no idea what leafing actually entailed)! But before I started, I painted the lamp espresso, that way any color peeking through would be dark, just like regular mercury glass.


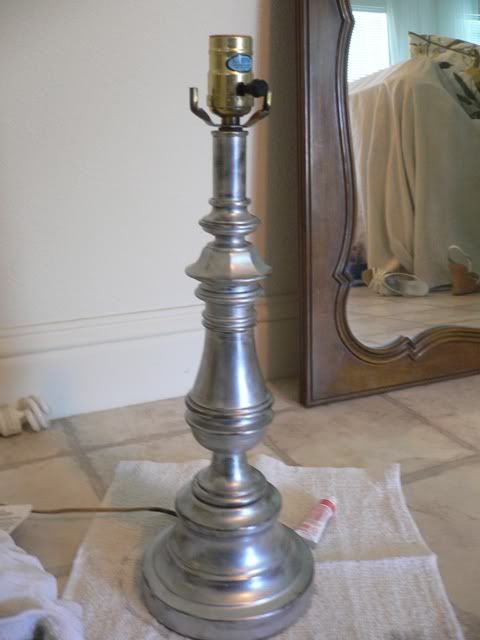
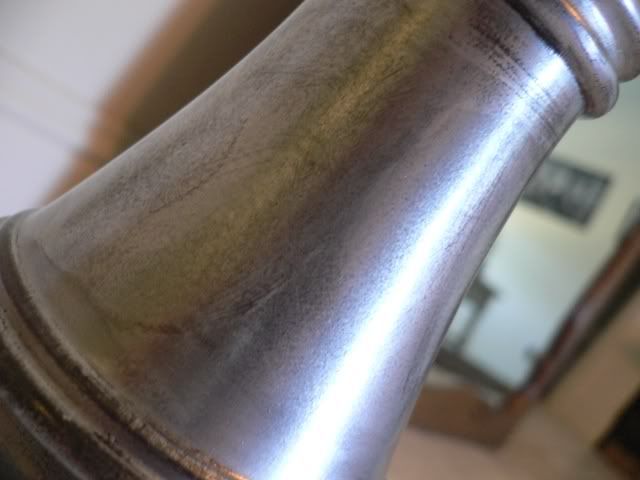
    (Erm, sorry for my--ahem!--slightly crooked picture)

    Then all it took was rubbing it on. I used my finger (which was very silver by the time I was done) and just sort of went at it! A little goes a ridiculously long way. I couldn't believe how little of the tube I used. Once it's dry (and it dries with in minutes, if not seconds) all it takes is a little rubbing with a rag. Any areas that rubbed off in a way I wasn't happy with, I just added more of the cream. I love the way it works! I'm going to go crazy with this stuff (after all, I still need lamps for our master bedroom).
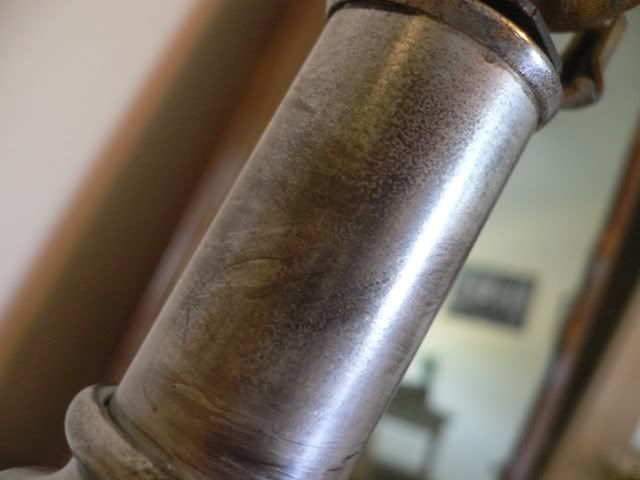


    It's not a dead ringer for mercury glass, but I have no doubts that this was a better choice than spray paint.

    Now all I needed was a lamp shade. I tried to make my own frame and cover it with burlap. The frame making went fine, but the whole covering it with fabric was a little more difficult than I had anticipated. I started searching for just a simple burlap lamp shade, even though I really wanted the see through effect (which can only be achieved with an unlined shade). On a whim (read: out of sheer desperation) I happened to check Pottery Barn's website, which is where I found this.


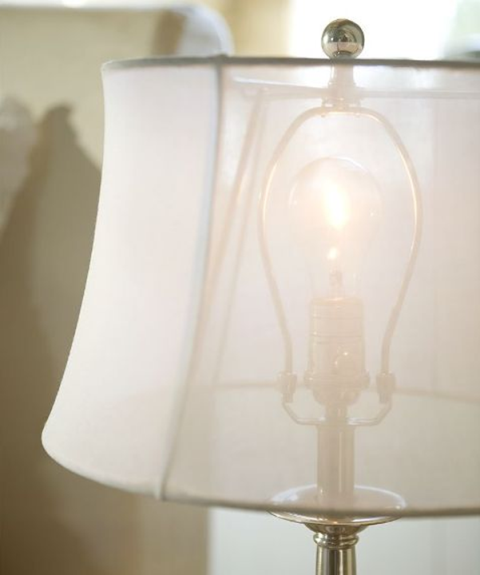
    It's much more sheer than the burlap, but the concept is the same! I love the softness is gives the metal of the lamp in their photo. But the best part was the $19.99 clearance price tag! Well, that and I paid for it with a gift card so technically, technically there was no out of pocket cost. =)


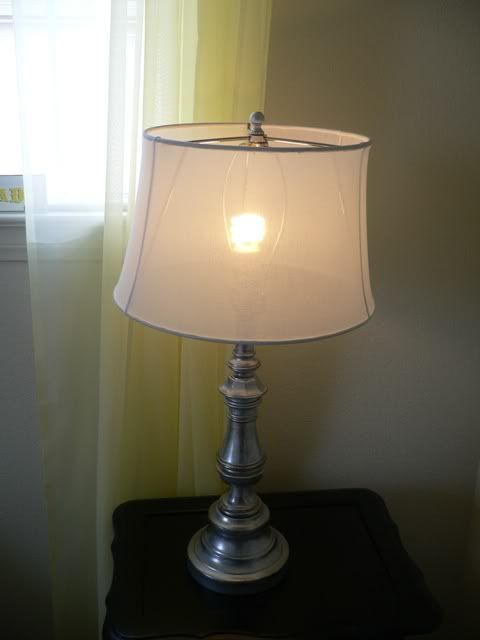
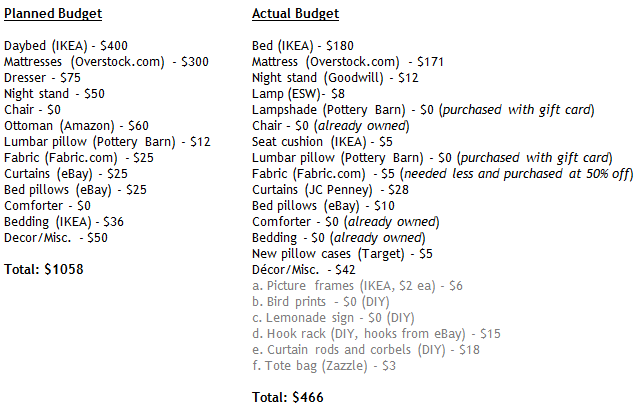
    All in all, my new lamp cost me $28 total, but only $8 out of pocket! If you're better at covering your own lamp shade, this is a wonderful way to add a little sparkle to your room without shelling out a lot of paper.


    I'm linking up to:
    DIY Project Parade @ The DIY Show-Off
    Trash to Treasure Tuesday @ Reinvented
    Power of Paint Party @ Domestically Speaking

    Exciting stuff that has zip to do with DIY (and one that does)

    I've been absent, I know. But oh my gosh I've been having so much fun and such good things have been happening! I've been wanting to sit down and share them each with you as they've come along, but it seems like I would have been posting every day twice a day (this is why I should probably set up a Twitter account). So, here's what's up.

    1.) I got pampered before my big birthday bash.
    Okay, so not totally newsworthy, but hey! A mani/pedi, a faux-tan, and a new hair color can totally make the entire week better! And believe me, they did!

    2.) I won tickets to a movie premiere.
    I was so totally stoked!! I believe all I could say over and over again was, "Ohmygodohmygodohmygod!" It was one of those "be-our-numbered-caller-and-you'll-win" radio things. I got a busy tone twice when I called and on the third time it was ringing! When the guy picked up and said I was the right caller I screamed! Like, right into his ear. Profuse apologizing followed.

    3. I had my big birthday bash.
    Oh. So. Fun! I've got bruises galore from sliding across the floor (line dancing) and from riding the mechanical bull, but good birthdays always leave some sort of mark on us, don't they? Here's yours truly unleashing her inner cowgirl for the big 2-6. And I actually managed to stay on the entire time!


    4. I've been working out like crazy and it's paying off.
    Any military spouse can tell you that deployments are the best time to get back in shape, and I've been taking full advantage of it. I've been striving to get back down to my pre-surgery weight of 118 pounds. As of today I weigh 121.6, and if I subtract the three pounds for my implants (which I always do) I'm officially at 118.6! I've noticed all my pants have started to slide down my hips, resulting in constant skyward yanking, so apparently some new jeans (and a belt) are in order soon!

    5. I scored patio furniture for free!
    I'll do a full post on this once I start working on it. But Mom and I made a trip over to Urban Barn in Escondido, where I scored a wicker chair that's in almost brand new condition, and an adorable side table for under $70 total (I'm also going back for an amazing vintage galvanized tub that I put on hold). Well, for some reason this shopping spree triggered Mom's memory and she remembered that my step-dad had some old furniture squirreled away somewhere. Turned out to be two wooden benches, another side table, and two cool architecture-metal-type-things. It basically completed our patio set for zilch (although I'd still like to find one more wicker chair)!

    So, that's what's been going on! I haven't even had time to complete a lamp that I'd started last week, although I'm hoping to get to it today. I have a friend coming in from North Carolina for a few days so I may be absent again here and there. But I still have my guest room to photograph and share (the lamp is the last detail) and once that's finished it's onto the patio...or master bedroom...or both...;)

    May 12, 2010

    DIY-vintage totes

    What's not to love about Layla's reading room at The Lettered Cottage? The stripes, the gorgeous natural light, all those fabulous little trinkets! The whole rooms begs you to crawl inside and snuggle! I saved a picture of her old reading room (they recently did a revamp) where she had a shelf hanging on one of the walls. You can't see it very well, but it's on this wall here.


    (photo courtesy of The Lettered Cottage)

    I loved the raw wooden texture of the shelf.


    (photo courtesy of The Lettered Cottage)

    But even more so, I loved the little market tote she had hanging from the pegs.


    (photo courtesy of The Lettered Cottage)

    Now, I knew that what I wanted did not exist. I wanted something with a hint of Irish to it (because you know I have to have a little something in every room). So I decided to make my own! First I started in Microsoft Office PowerPoint and made this graphic.


    I chose to use the name of one of the oldest hotels in Ireland (The Beaufield Mews). Then I found out what street it was on (Stillorgan) and used the Gaelic word for street (sràid). Since the hotel is in the county of Dublin, I made sure to include that as well. And of course, No. 19 is thrown in there because it's the day we got married! =) But I wanted to make sure that once it was printed onto the tote it looked nice and aged. So using the good old fashioned paint program, I used the "spray paint" tool and went to town!


    All that was left was to make the tote. I chose to use Zazzle, but you could use Café Press or any other printing company. I had some merchnadise credit so the tote only cost me $5 out of pocket. And this is how it turned out in real life.


    I love it!! Best thing? It was incredibly simple to "make!" Now I have the perfect tote to hang on my hook rack. I just need to find some magazines to fill it in !

    May 11, 2010

    Wishin' & Hopin' (a.k.a. a new project)

    I'm so sorry in advanced if anyone now has that syrupy sweet song stuck in their head! =) But that's what I'm doing for tomorrow's outing with Mom. We're going to a local industrial-salvage-flea-market-farm place in hopes that I'll be able to find some of those things I've been searching oh so hard for at other places. I know, I know, I'm being cryptic. I'll tell you what the heck I'm jabbering about.

    Jason and I have never had a proper outdoor space. From our first teeny-tiny-can-barely-move apartment, to the newly-built-you-have-to-do-all-the-work-yourself-and-you-don't-know-anything-about-DIY house in North Carolina, to the holy-hell-it's-actually-hotter-than-hell-out-here grassless backyard in 29 Palms, our current home is the first time we've actually lived in a place where a backyard isn't just a dream, it's actually a reality. And I aim to take advantage of that!

    I started by cheating. I began to look at all the matching sets they carry in places like Wal-Mart, Sears, Target, BB&B, and so on. In my defence, K-Mart was running their "layaway" commercials and my subconscious was duped into believing it needed a retail set. I had this one all picked out from Wal-Mart.


    But, that was until The Nesting Place shared this photo from Home Sweet Inspiration.


    And that's what I've been looking so freaking hard for--vintage, used, old outdoor furniture. And would you believe me when I say it's the hardest freaking stuff to find?! Does no one thrown out wicker anymore?? I've also got my eye out for an old metal baby crib. I saw this one when Miss Mustard Seed shared her space with us for the parade of homes. I thought it would work equally well outdoors (using outdoor cushions and fabrics of course)!


    There's still a matter of some sort of canopy or gazebo, but I think my little brain has whipped up an idea. Of course, the idea won't exactly work unless there is furniture underneath it! So wish me luck, as I hope to find a few pieces tomorrow with Mom!

    May 10, 2010

    Sweet somethings


    - Finish painting night stand

    - Start cleaning up the guest room

    - Begin accessorizing

    - Visit lots of antique malls, flea markets, and beach-side thrift stores with Mom

    - Mother's Day lunch with Mom

    Well, Mom and I struck out big time at the flea markets and antique malls. Everything was either too pricey or not what I was looking for. And to be honest I'm looking for a lot of different things, so that was more discouraging than anything else (I mean, with a list as random and long as mine, you'd think I'd have better luck). I had my eye on two very nice bundles of vintage silverware, but when I found out they wanted $24 per bundle, I happily sent them on their way. Sorry, NO SALE! I did find this super cute vintage Valentine's Day postcard. It was $5 which is a little cringe inducing, but it's never been written on and that's something I don't come across very often! I'm debating on whether or not I want to write a little note to Jason on it, or if I want to frame it in an equally tiny and cute picture frame.


    I tried to figure out how old it is, and according to Wikipedia the U.S. Postal Service charged one cent for postacrds from July 1, 1928 until December 31, 1951. So this little thing is 59-82 years old!

    Ooh--I also managed to finish the night stand! It. Looks. Magnificent! I'm so in love with the curves, the way the black paint instantly made it look more polished, and I love all the room for accessorizing!


    Hello wall! No more rusty chicken wire!


    I love the books of dream interpretations and Elizabeth Barrett Browning poems (one of my favorite poets, and a gift from Jason).


    I have a lamp all picked out for the top, it's just undergoing a little Pottery Barn-inspired face lift. Tomorrow I should be getting the lamp shade I ordered for it (along with the bed mattress finally!). And then there's the tote bag I designed and ordered from Zazzle--hopefully that will get here soon as well! Ack! I have so many things I want to show and tell you about! I guess it will have to wait for the next post though. I've yammered on way too much for a Monday! =)

    I'm linking up:
    Project Parade @ The DIY Show Off
    Trash to Treasure Tuesday @ Reinvented
    Power of Paint Party @ Domestically Speaking